Cardskipper admin documentation
Below you find the full documentation of the admin portal. The information is documented for every navigation option.
You can also search on our most common questions for admin users.
If you have a tricky question you can always contact us.
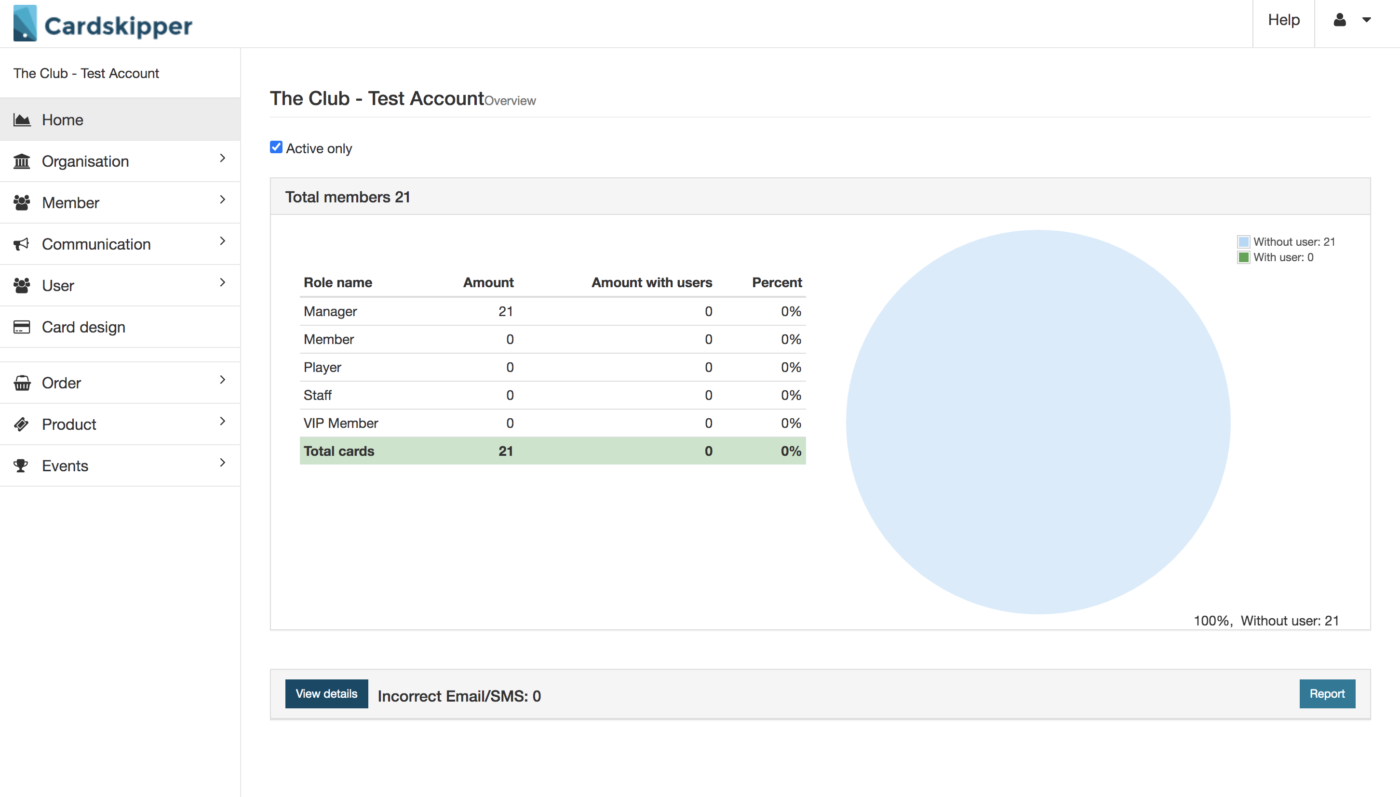
Home
Find statistics over your members at the home page. The percent value show the amount of registered members.
If a member has a wrong email or phone number it will appear an alert on the bottom of the page.
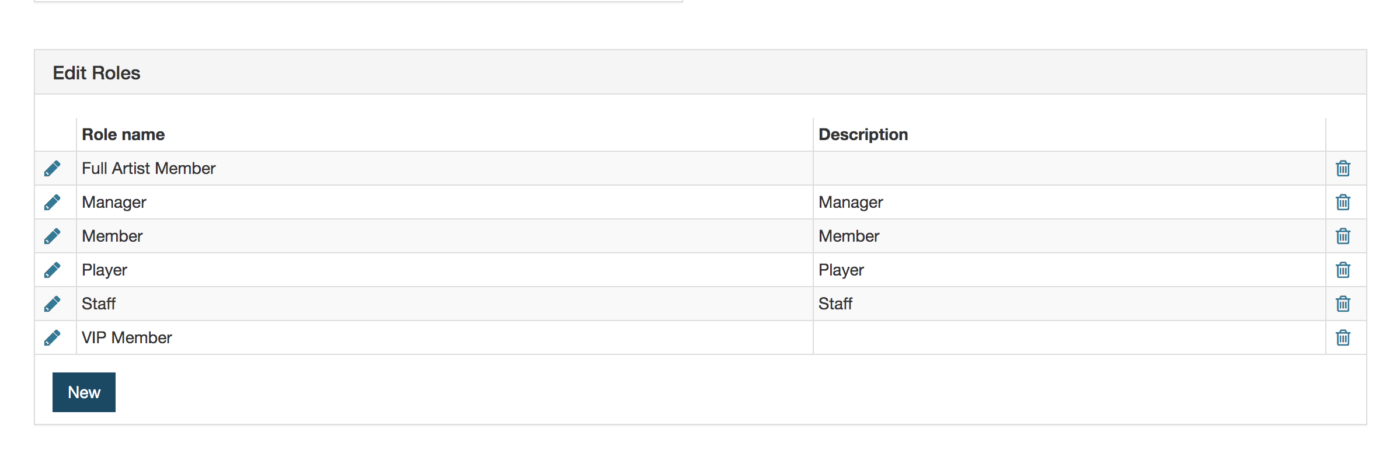
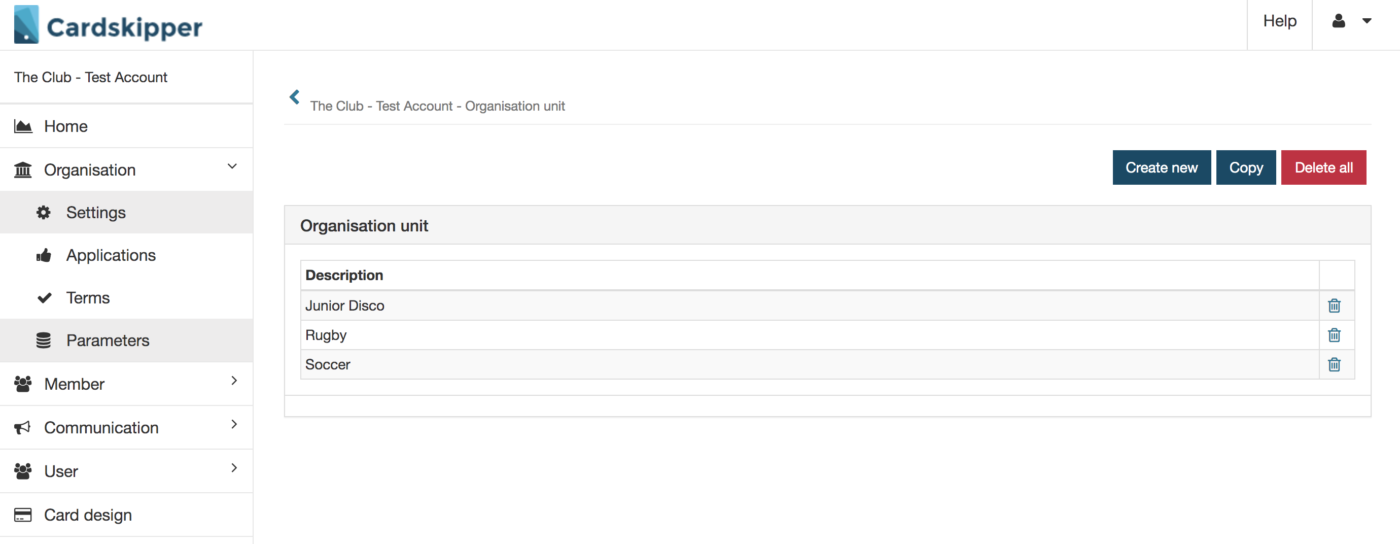
Organisation
Add a organisation logo to Card design and select a default logo.

Add or edit different roles to your organisation.
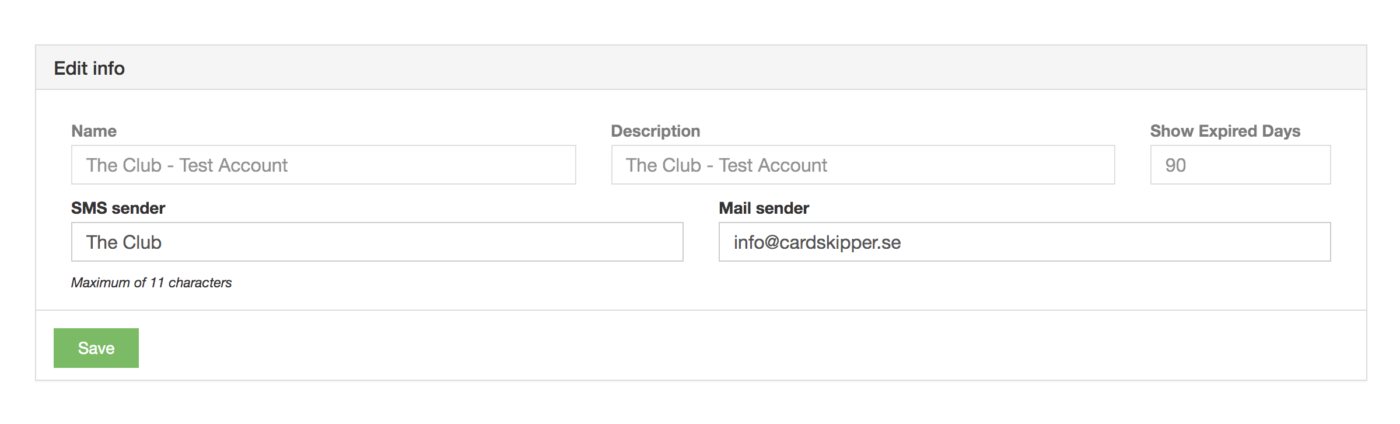
When the members receives the installation message they will see a sender. Edit the sms- and email sender here and make sure it fits.
Expired Days is the number of days the member can see a unvalid membership card after their membership expires.
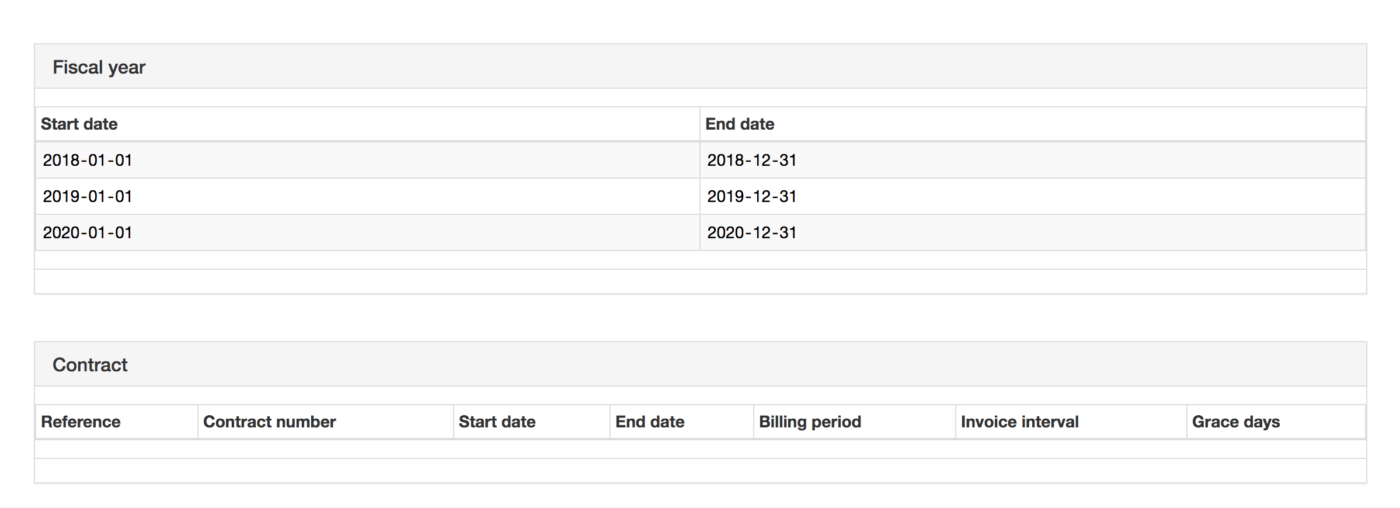
The system depends on the organisation’s fiscal year
Under Contract you see the agreements that your organisation has accepted to Cardskipper.
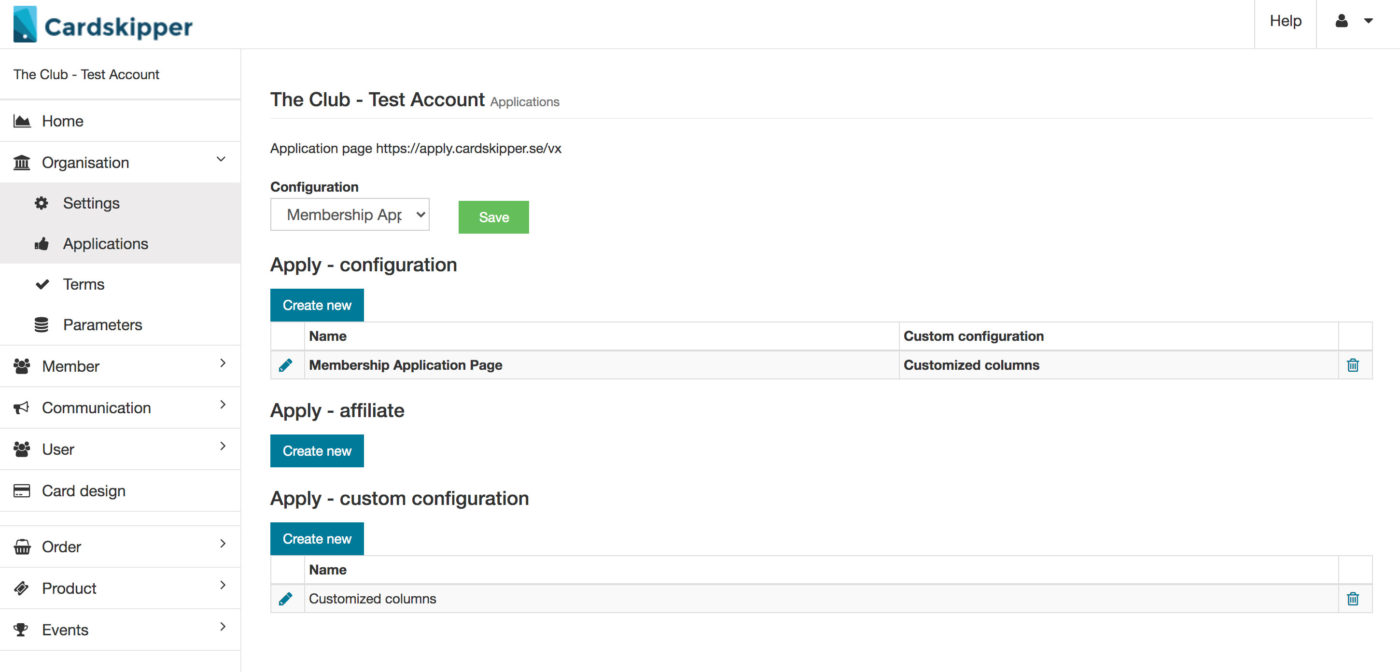
Application page is a link that you can share to people who wants to join your organisation.
Change the content of your application page by clicking the edit symbol on Apply – configuration and to change the parameters of the form click edit on Apply – custom configuration.
If you find this tricky just email us and we will help you set up the application page for you.
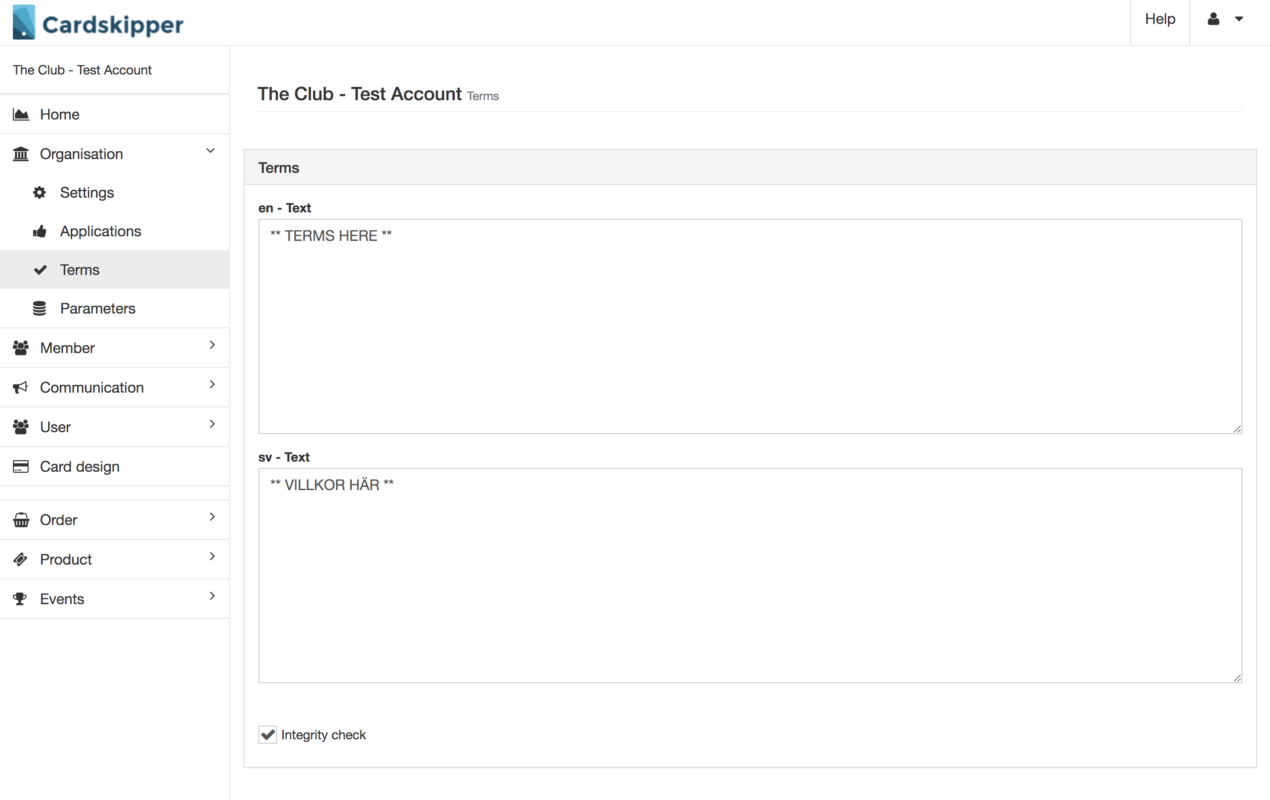
Considering that it is your organisation who manage the members, you are responsible for what conditions you have as an organisation.
The checkbox Integrity check force the user to accept or deny the terms before the sign in for the first time.
When the members apply via the application page – they have to fill in some parameters. Those parameters are you able to change, by adding options instead of free text.
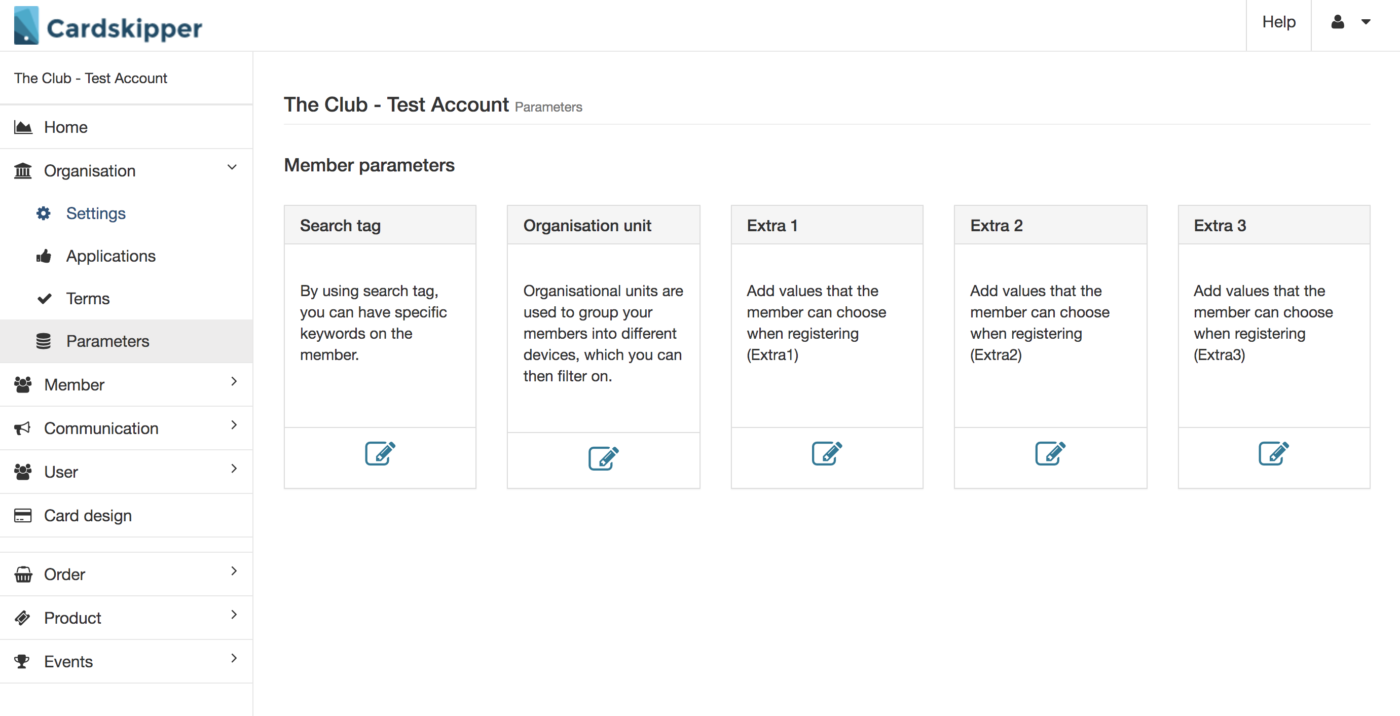
Create a new option by clicking the button up int he right corner and delete it by clicking the trash icon.
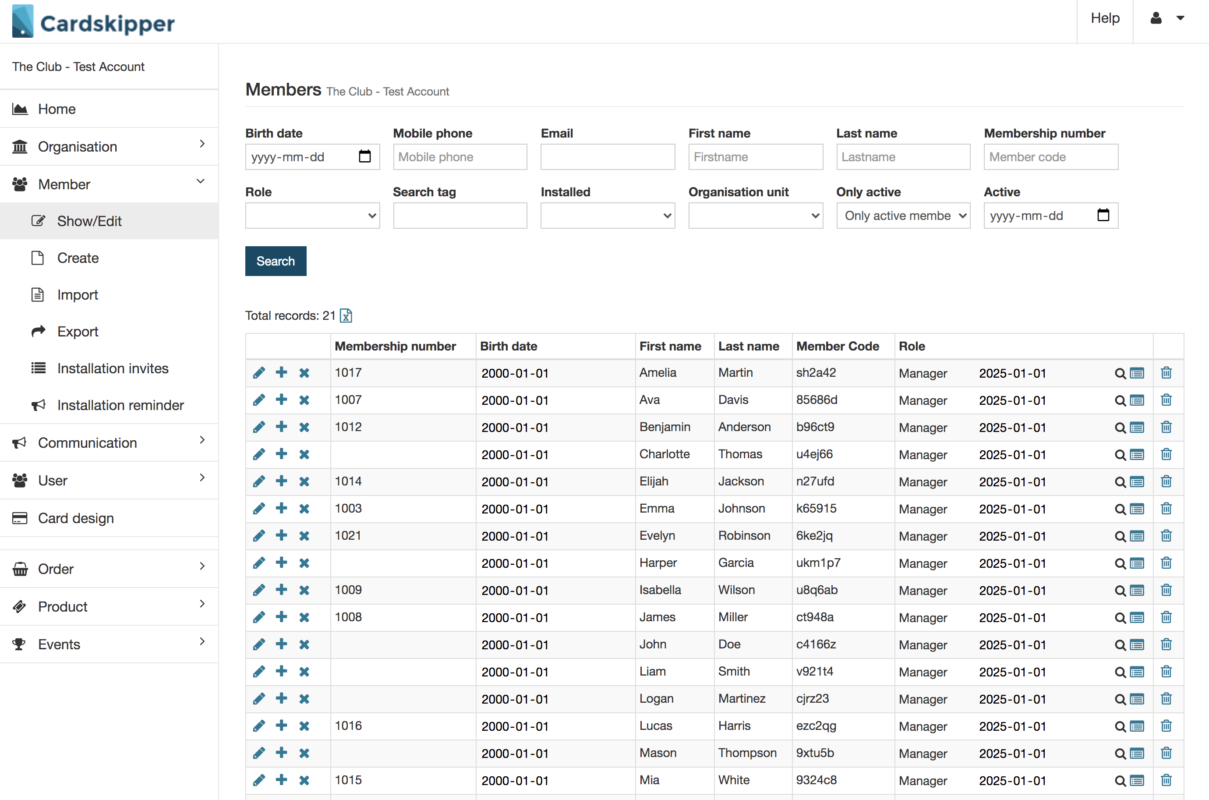
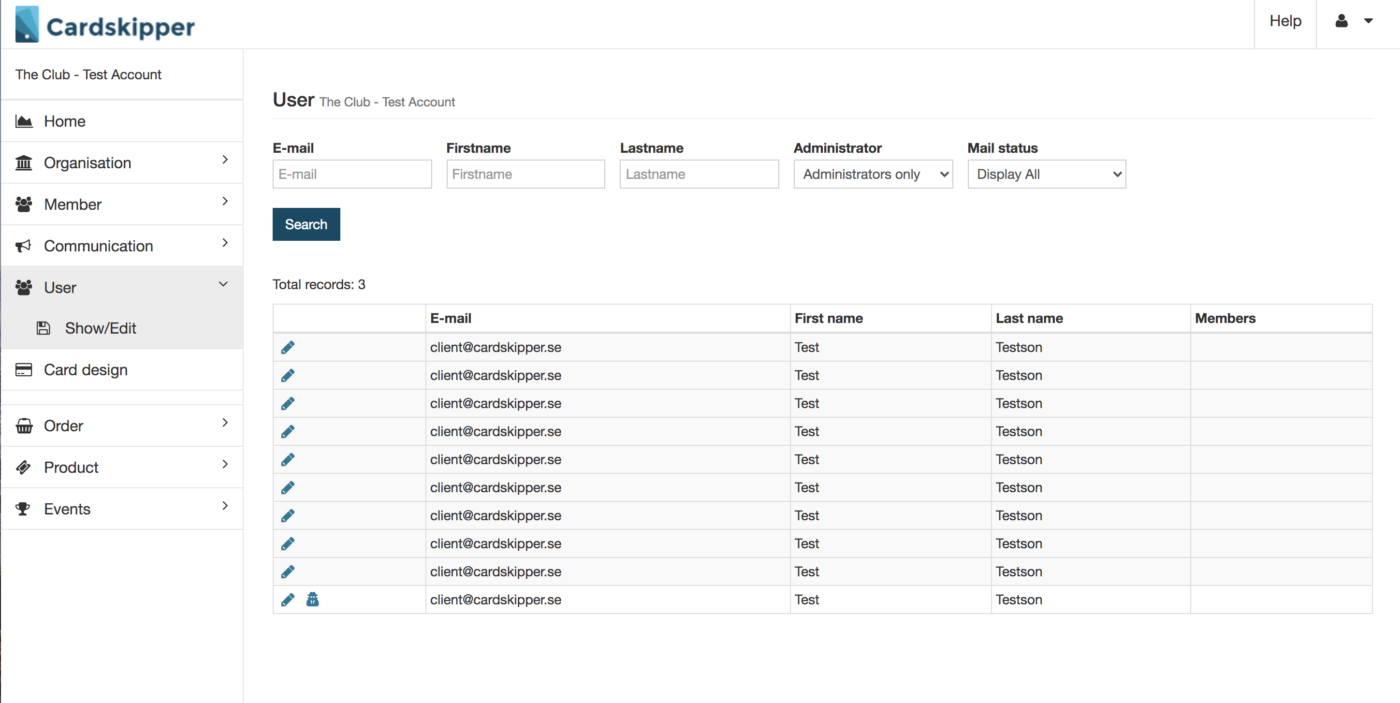
Member
Search and manage you members. Use the filter to search and export to excel file by clicking the icon.
Click for editing the details of the member.
Change the details of a member, do not forget to click Save.
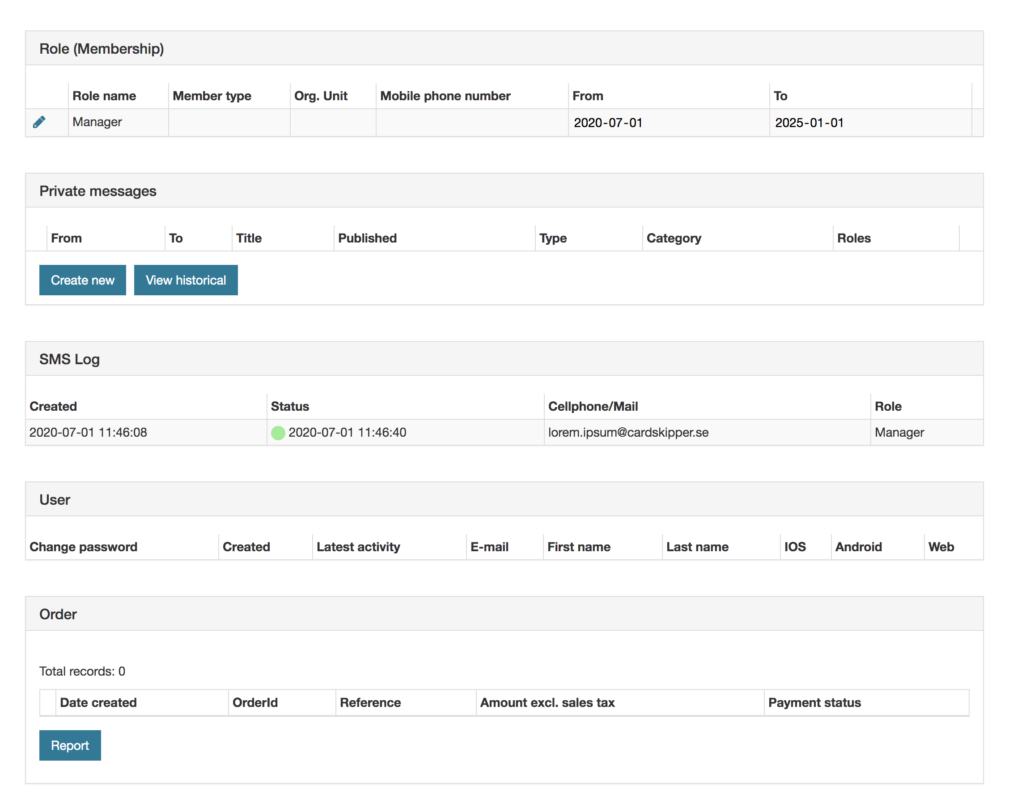
If you want to add an extra role click the blue button New role.
And if the member isn’t registered yet click the button Send installation reminder for sending a reminder to the member.
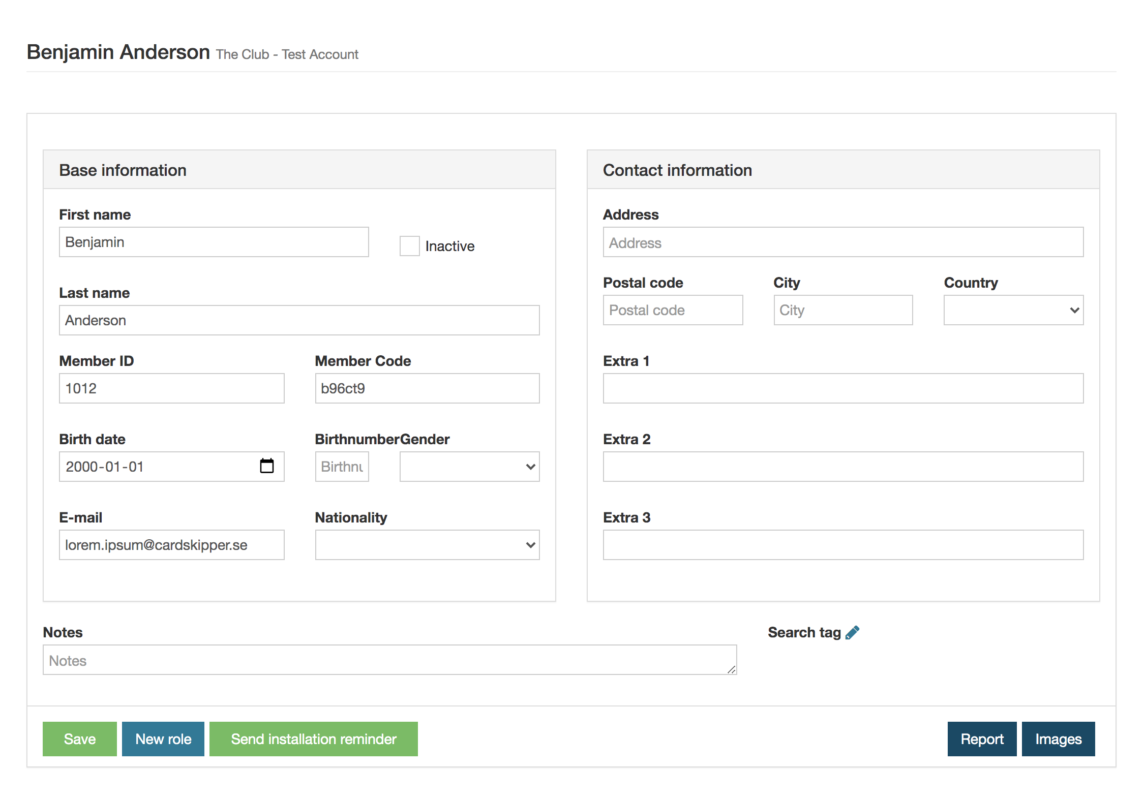
The membership dates is the period that the membership is valid. Click to extend the period or change the details of the membership (phone number, organisation unit, member type, address)
Private messages – send personal message to the member.
SMS Log – shows the number of installation invites via sms and email. The green dot means that the invitation i successfully sent.
User – shows what account the membership is sign with.
Order – purchases the member has made in the app.
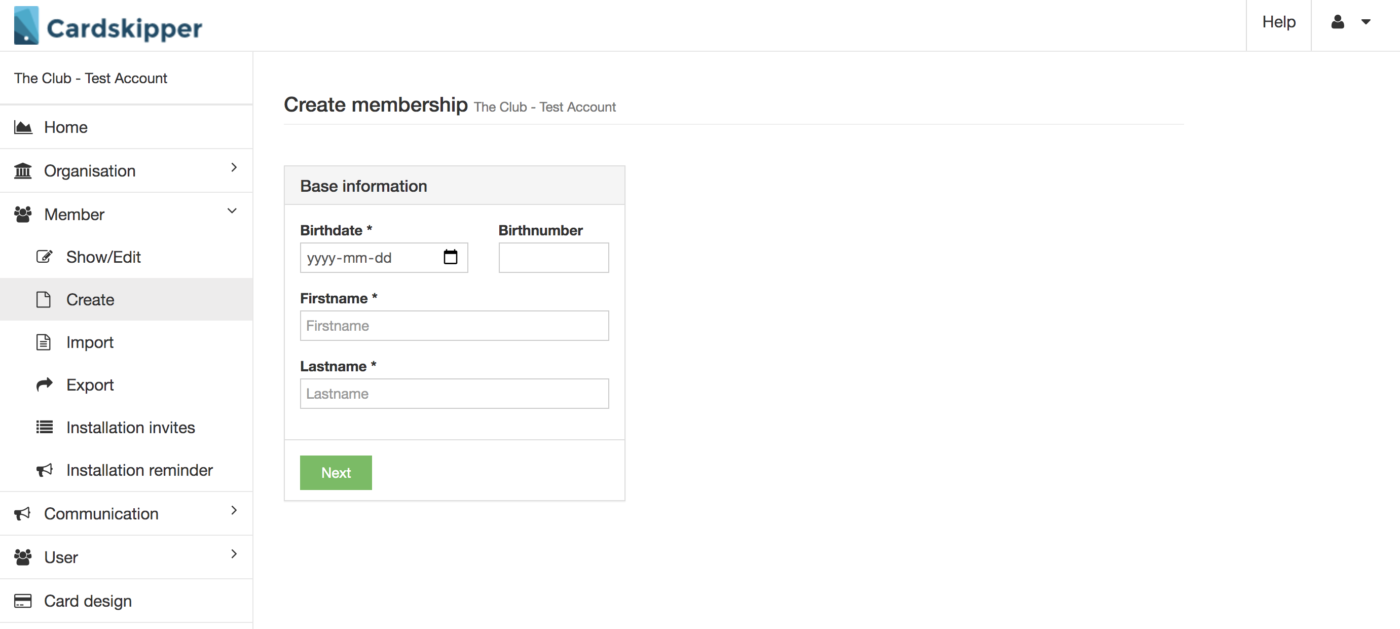
Create a member – fill in birthdate, birthnumber (not required), firstname, lastname and click Next.
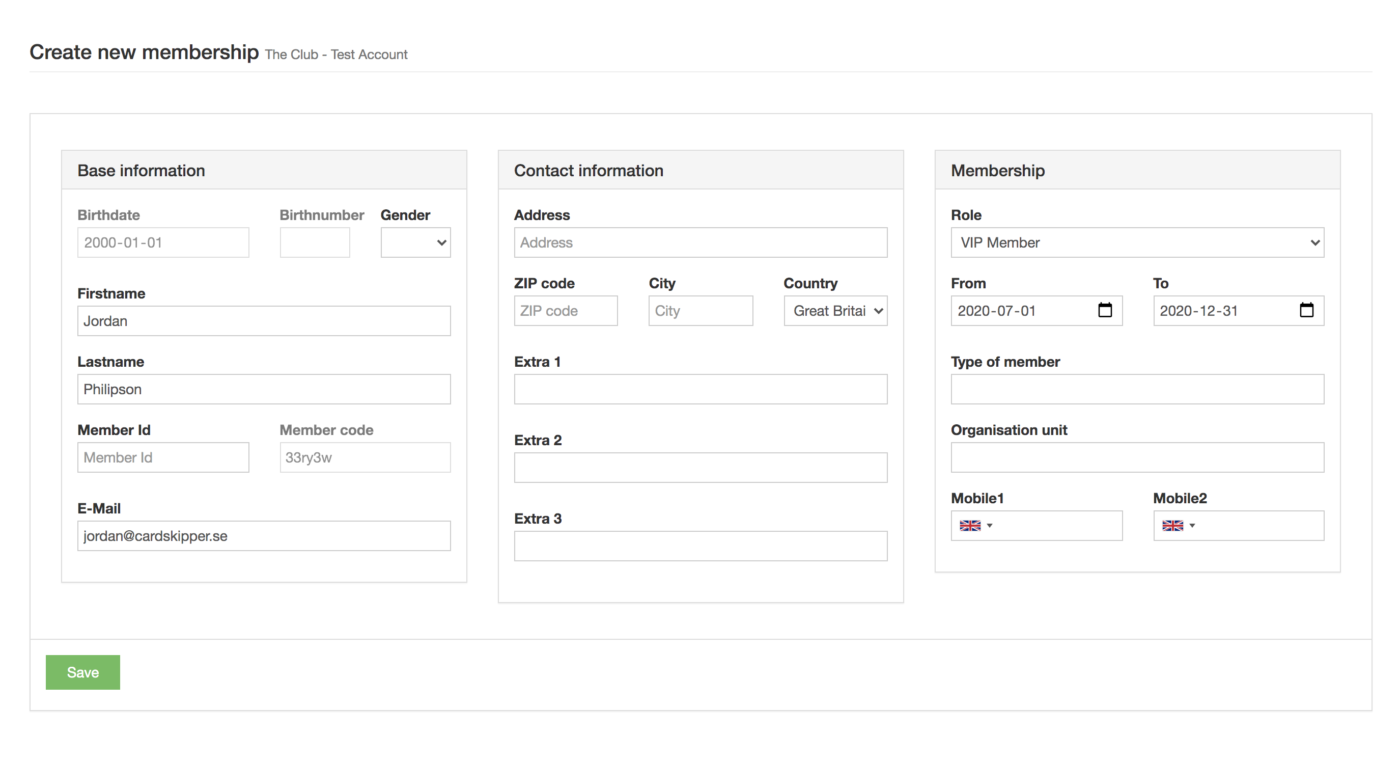
Fill the rest of the details and click Save.
Directly after the details are saved the member will receive an invite to the their email or/and phone.
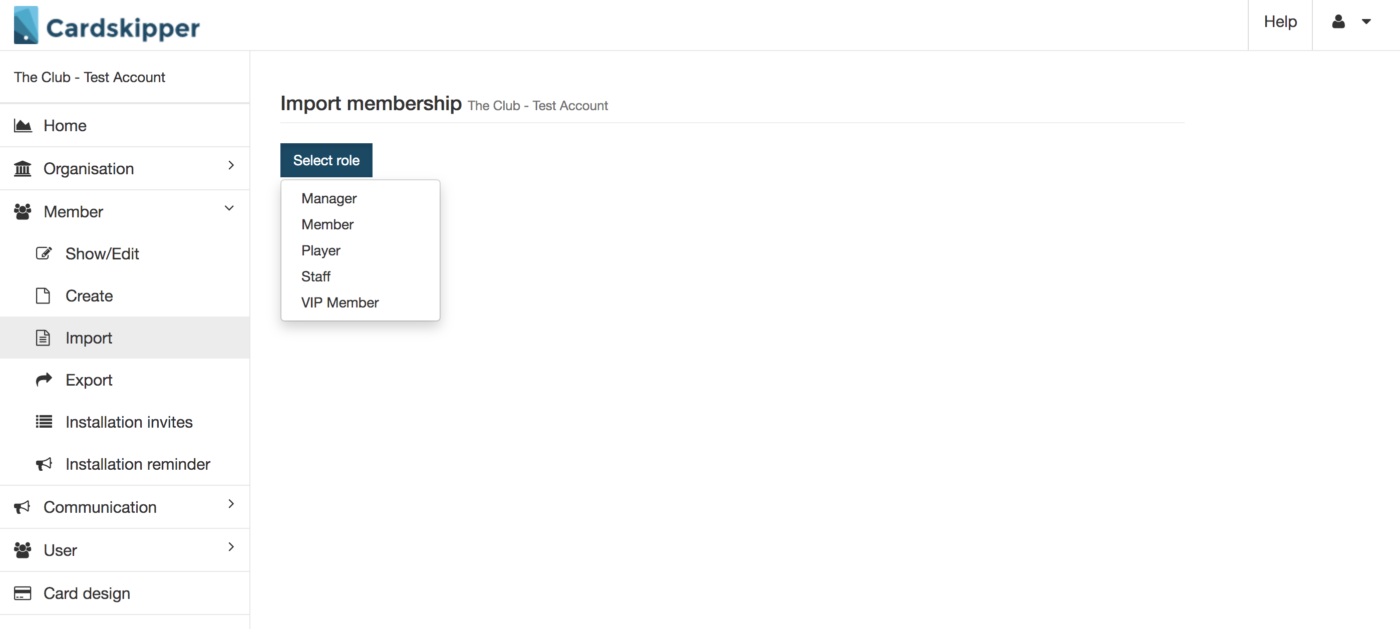
Instead of create 1 member at the time you can make an import based on a csv (excel) document.
Select the role that you want to import members to.
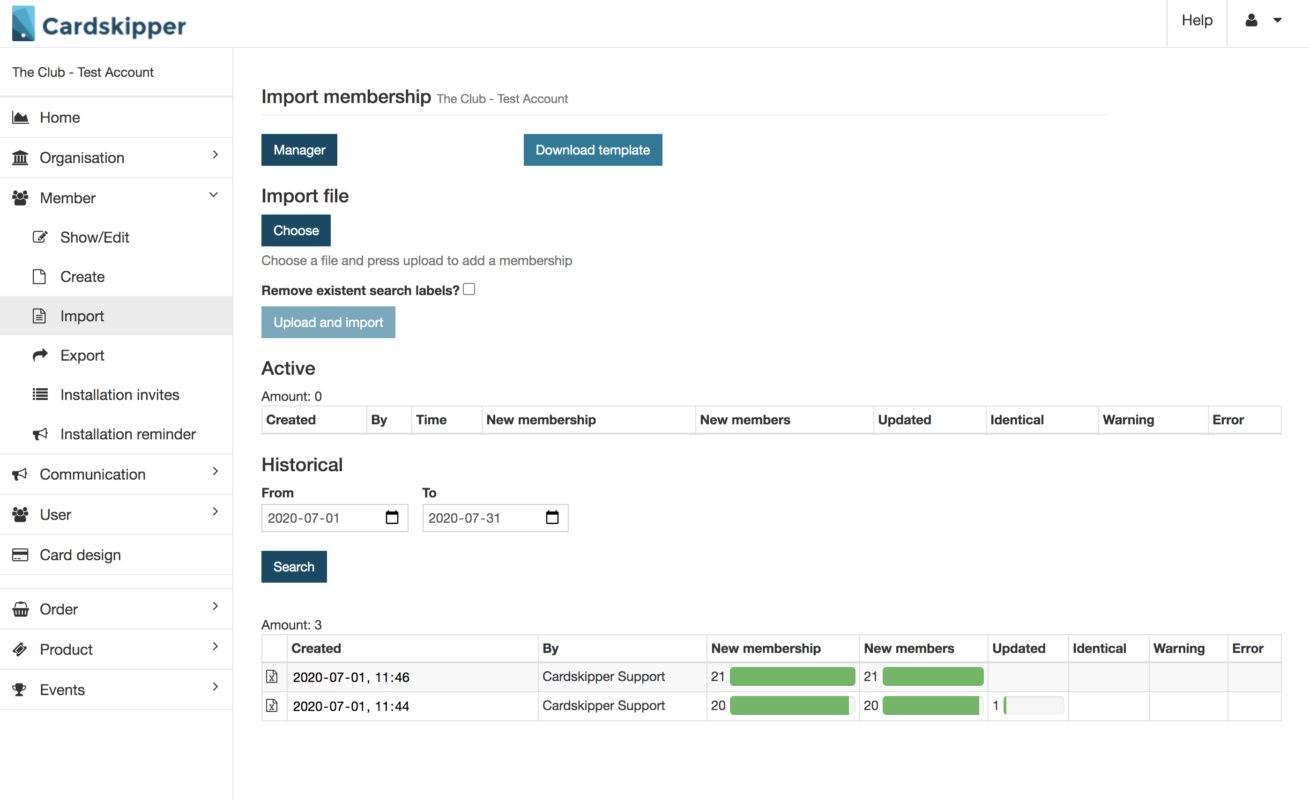
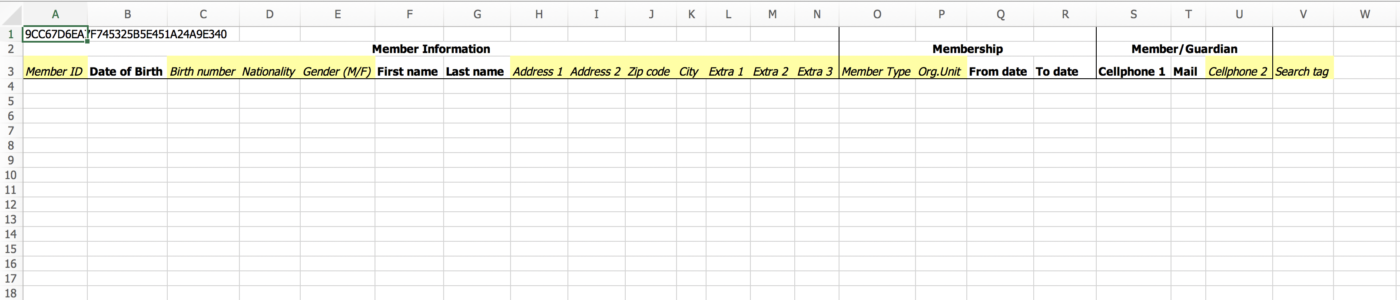
To import members you must use the correct excel file – click Download template
Add the members details in the excel file and save it on you computer. When the excel file is done you click Choose and select your saved excel file and then click Upload and import.
Open the template after downloading it.

All parameters are required except the yellow marked columns.
Member ID – make sure you use an unique id at every member.
Date of Birth – use the cell format “date” or make sure you enter the date as following “yyyymmdd” or “yyyy-mm-dd”.
Nationality – use the 3 worded short name (ISO 3166) for the country.
From date & To date – use the cell format “date” or make sure you enter the date as following “yyyymmdd” or “yyyy-mm-dd”.
Cellphone – use the full phone number (country code as well)
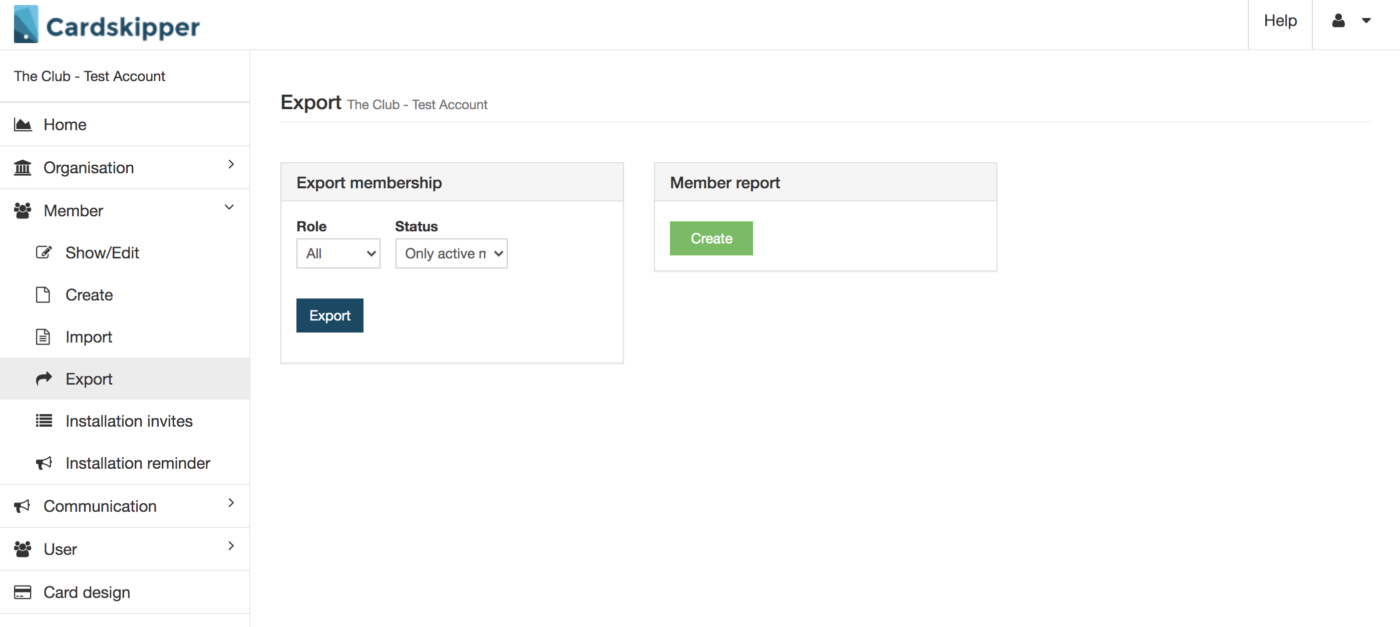
Export membership – select role and status and click Export to download an excel file.
Make sure you selected the correct role when you upload and import the excel file.
See all installation invites that are sent to the members.
successfully sent
sent to operator
incorrect number
waiting

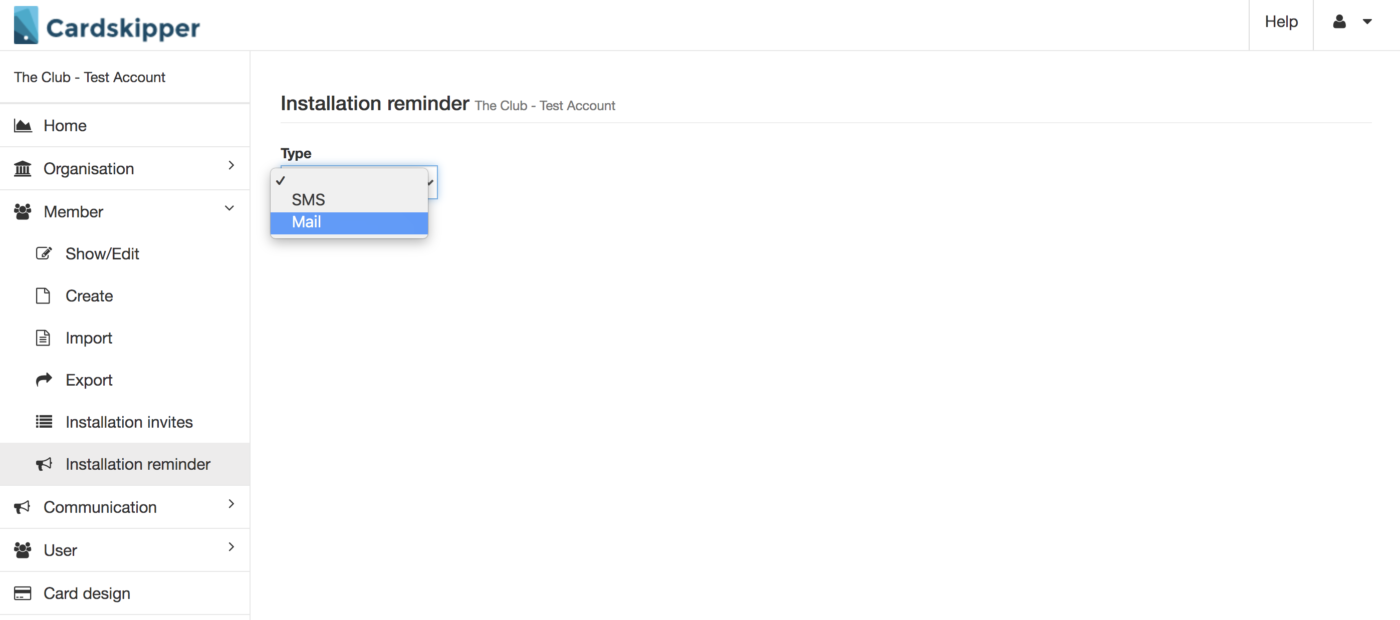
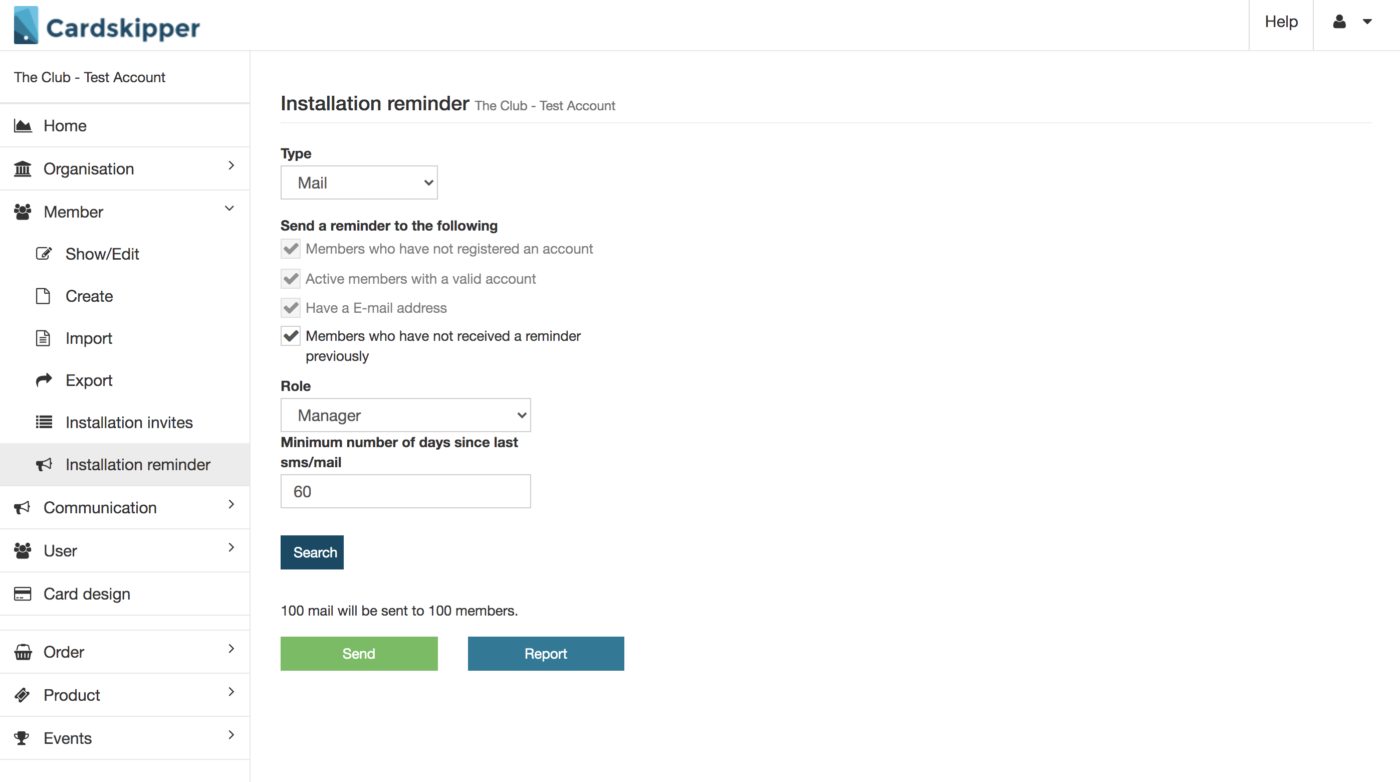
Select which type you want use to when sending the installation reminders.
Select role and number of days since the last invite was sent. Then it appears how many invites that will be sent. Click Send to send
Communication
Search and edit on created communications.
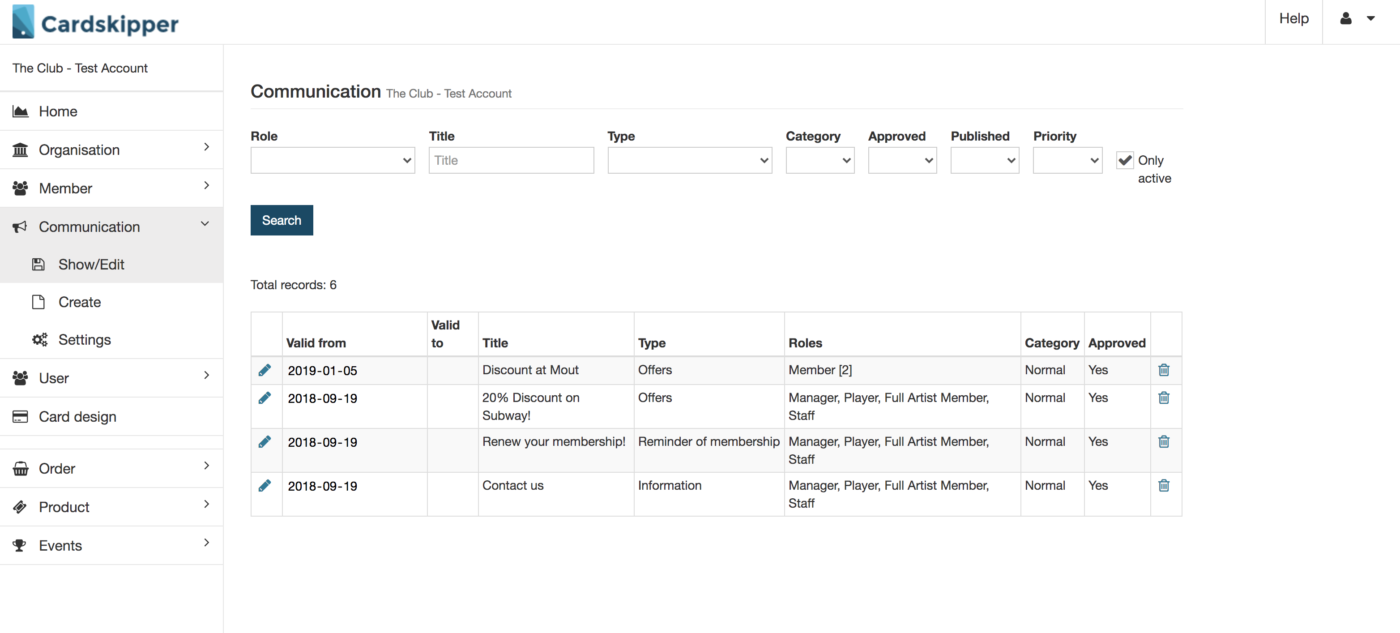
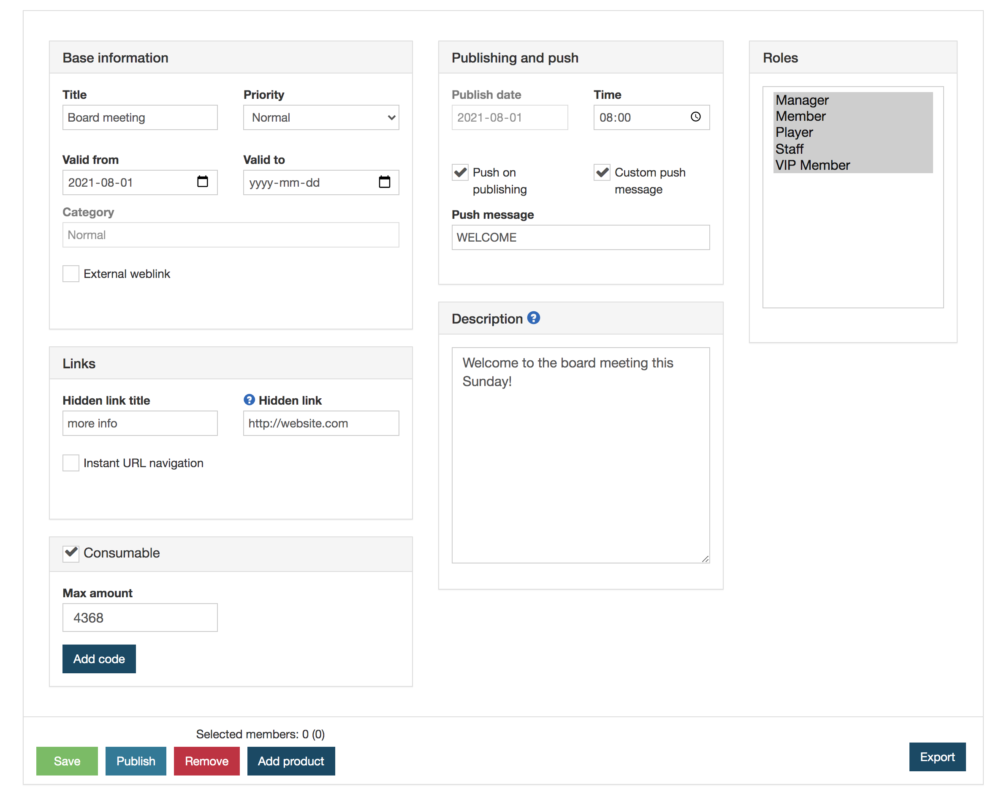
Even if the communication is published you can change the content afterwards (obviously the publish date is not changeable).
Do not forget to click Save
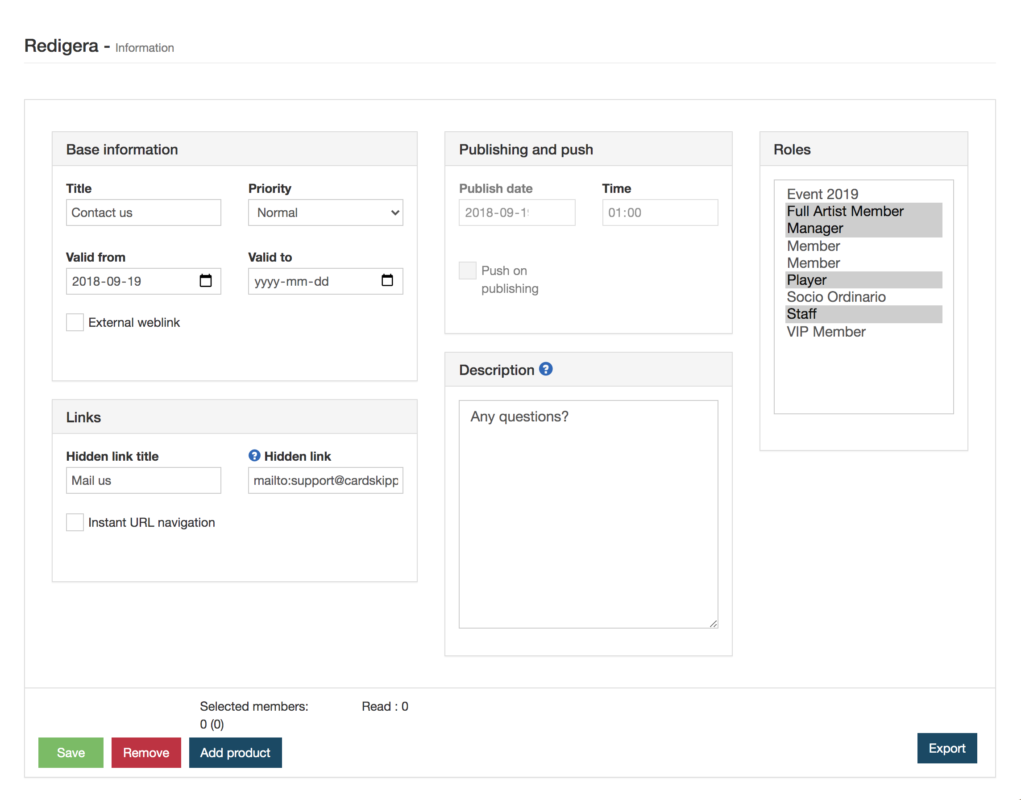
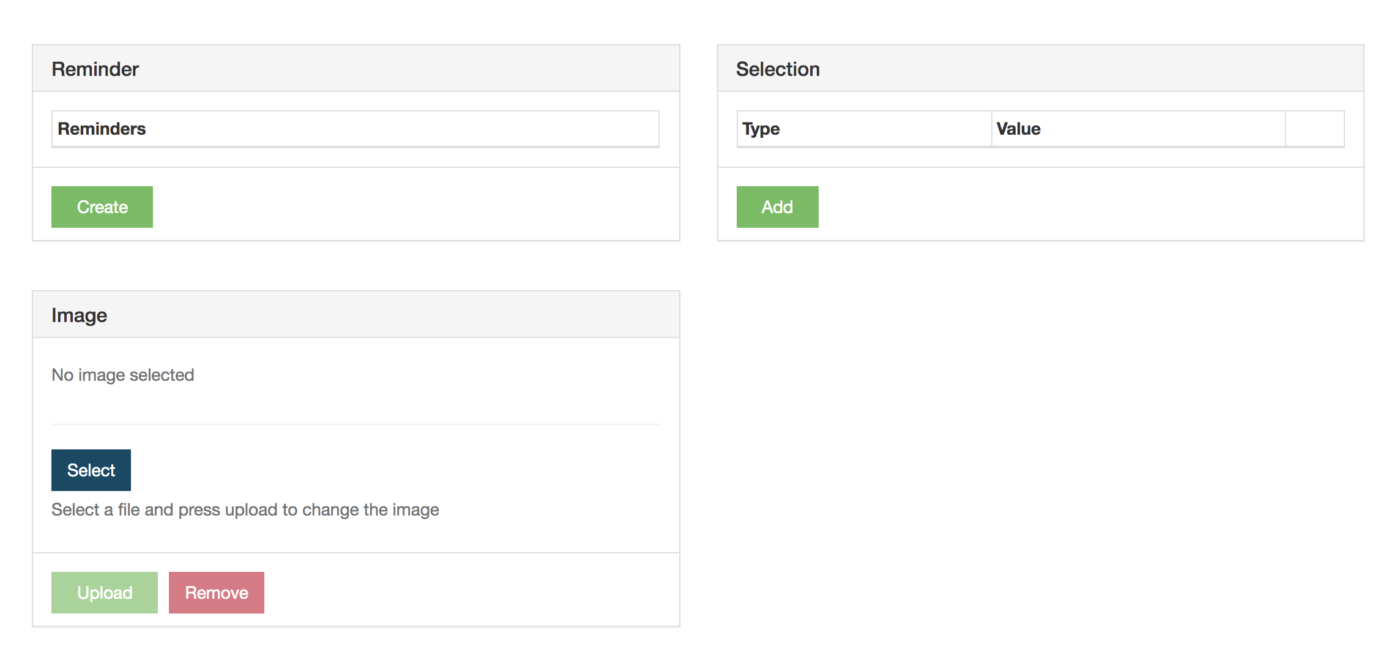
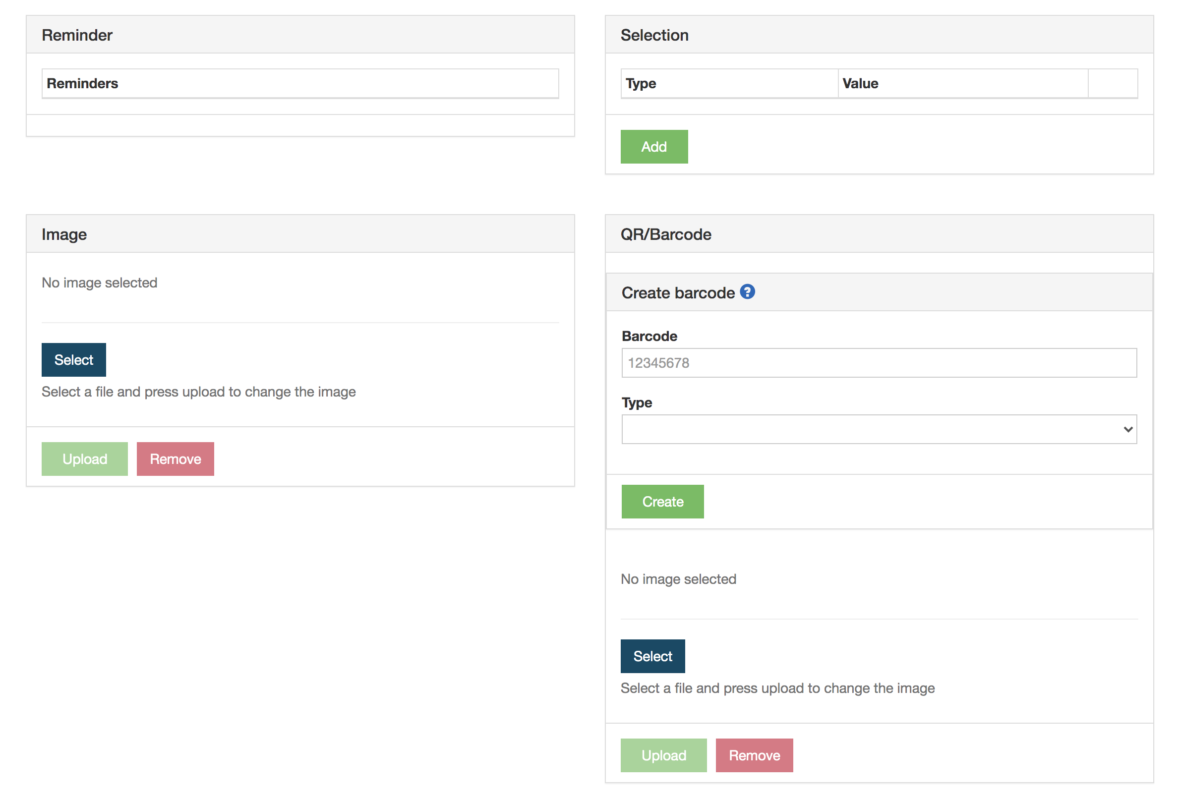
If you want to resend the communication click at the Reminders Create.
Be more specific and change the target group by clicking on Selection Add and then choose what information the target group should be filter of.
It’s also possible to add an image to the communication (optimal ratio is 16:9).
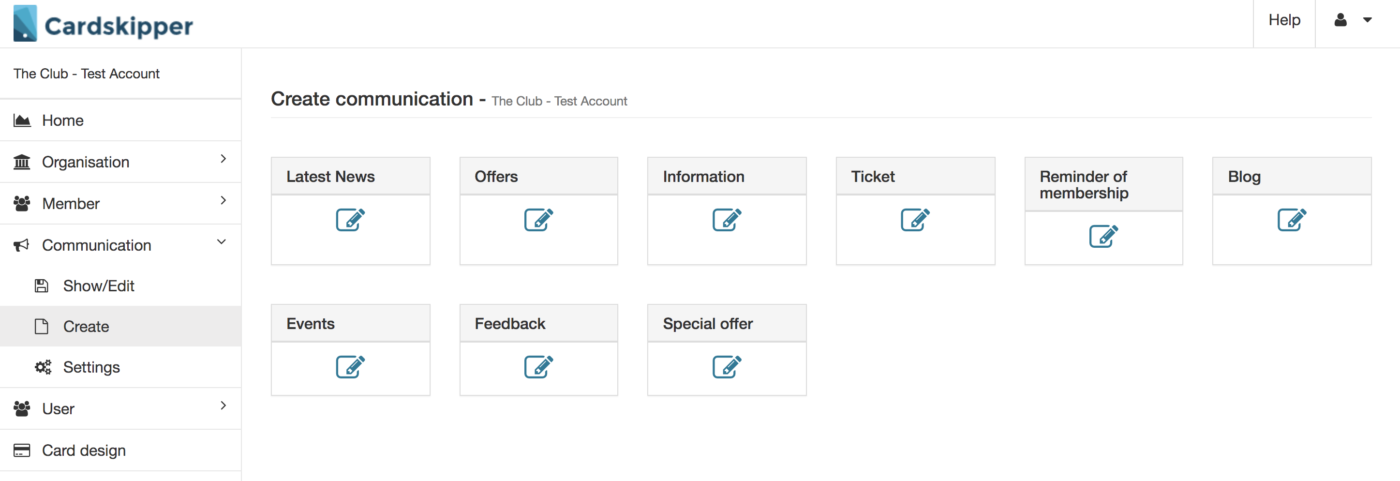
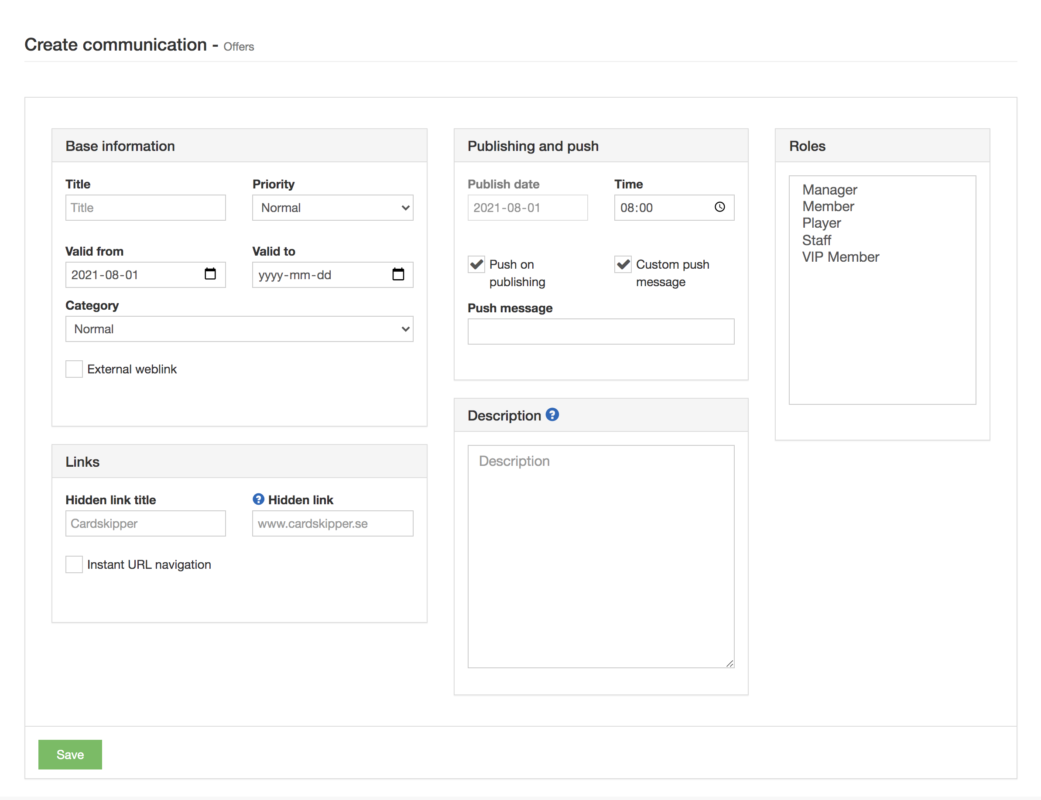
Select communication type when you creating a communication. The communication type will appear as a category column in the app.
Base information – Choose a title, priority level and time period that the communication should be valid for.
Links – add a button on the communication that contains a hidden link.
Publishing and push – Change the time the communication should be published at. Select push if you want to alert your members with an app notification. You can also overwrite the title by adding a custom push message.
Description – write a text that describe the communication.
Roles – which roles should be able to see the communication?
Click Save
Make sure the content is correct before you click Publish. When it’s published the members will receive the communication in their app (and push notification if that setting is used)
If you want to make a consumable offer of the communication click Consumable and choose a code that the store want to use at the cash out desk.
Be more specific and change the target group by clicking on Selection Add and then choose what information the target group should be filter of.
Add an image (optimal ratio is 16:9).
If you want to have a QR/Barcode it’s possible to generate an unique code for every member. Click the and select which data it should be generate by.
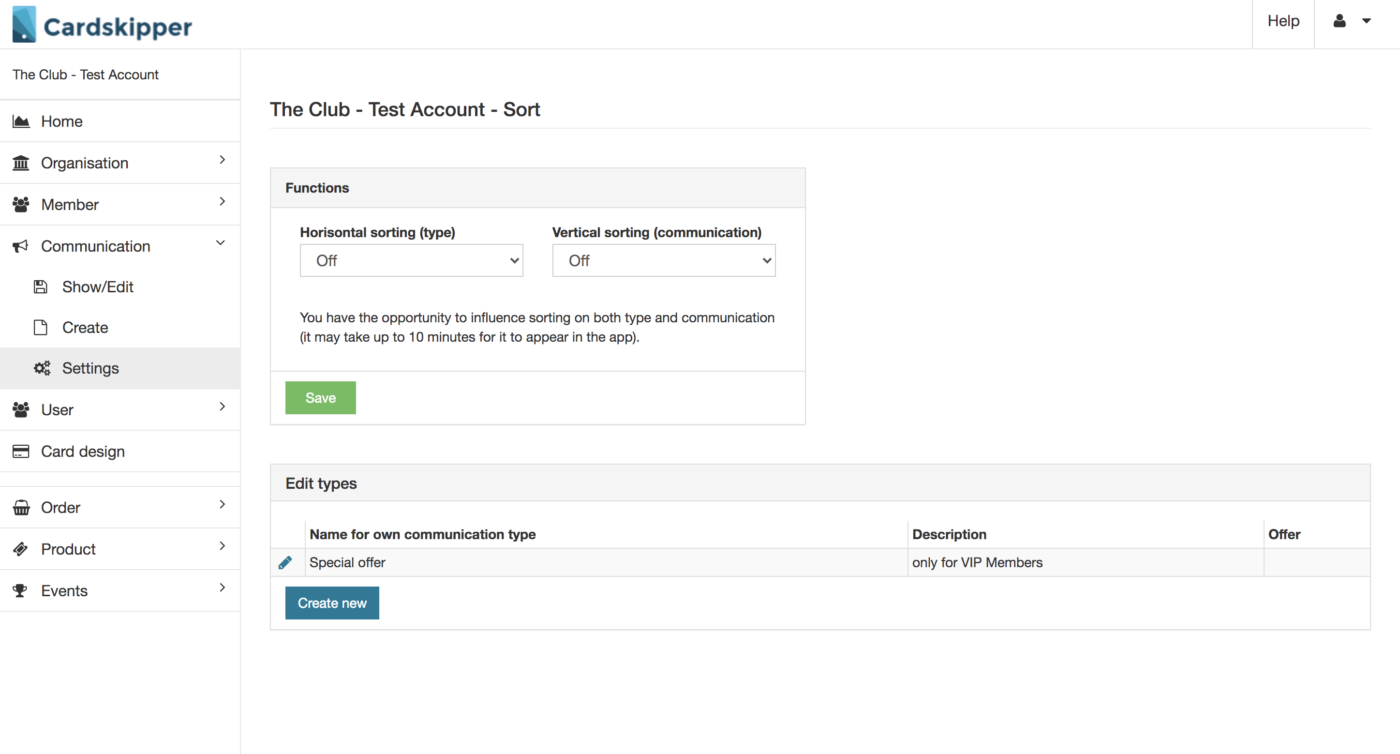
If you want change the priority of the communication – turn on the horizontal and vertical sorting and change the order of the types by dragging the element.
For adding a communication type click at Create new
Admin
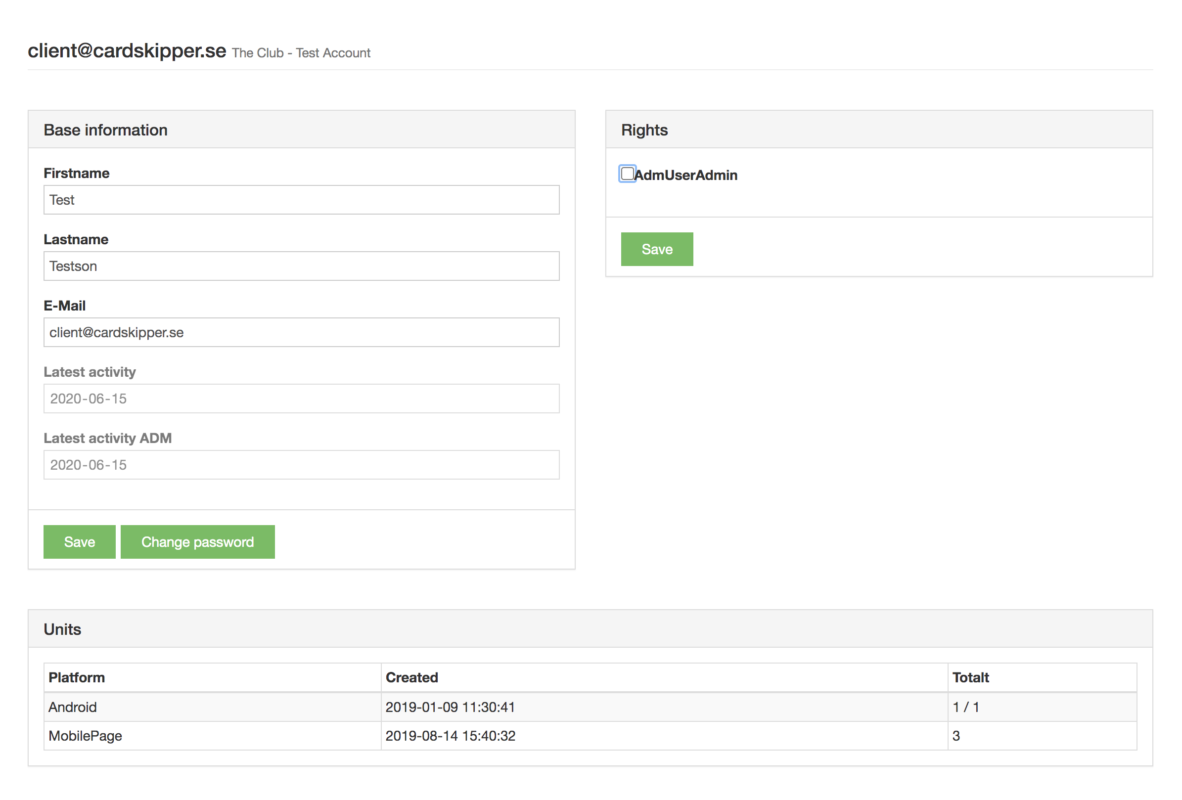
When a member get registered, they will create an user as well. By clicking you can see details regarding their user account.
If the user should be an admin user – change the Rights setting.
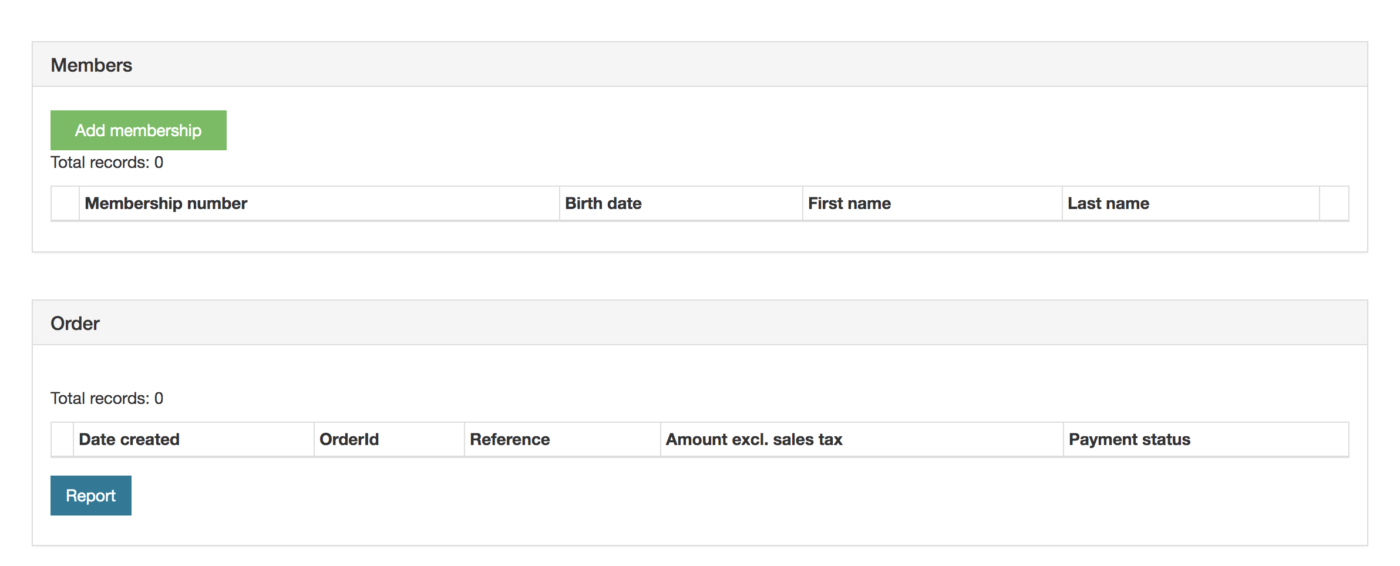
See what device the user are using and what memberships and orders that are connected to the user.
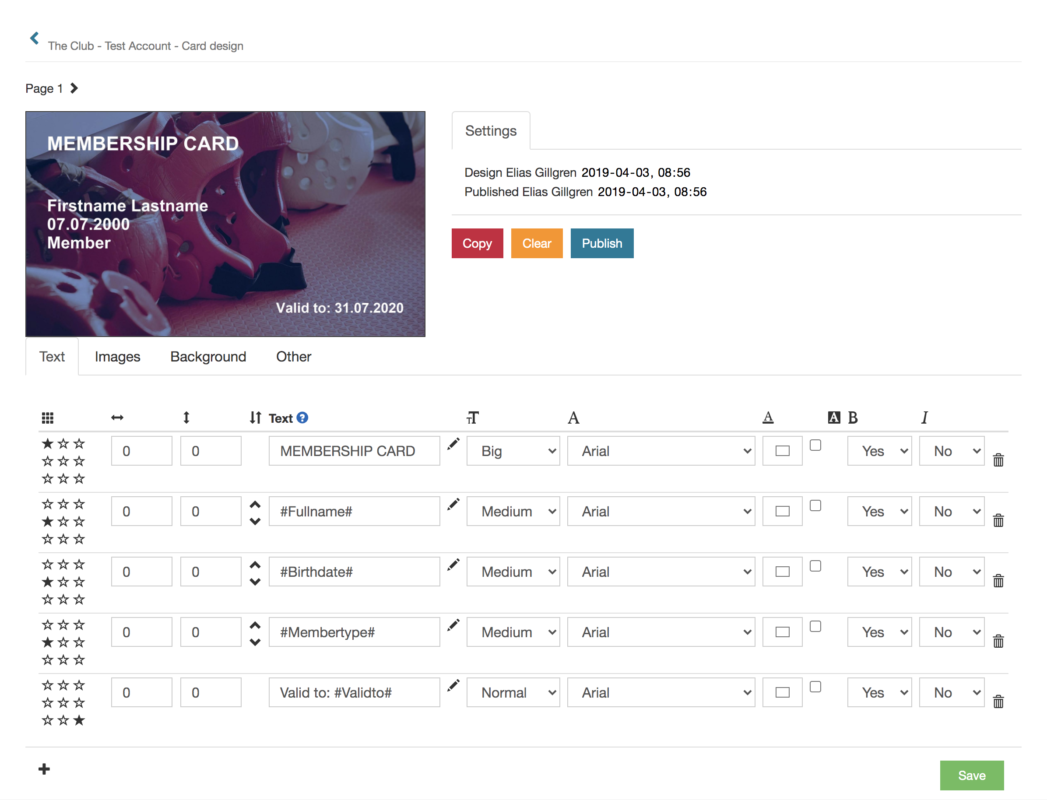
Card design
Which role do you want to edit?
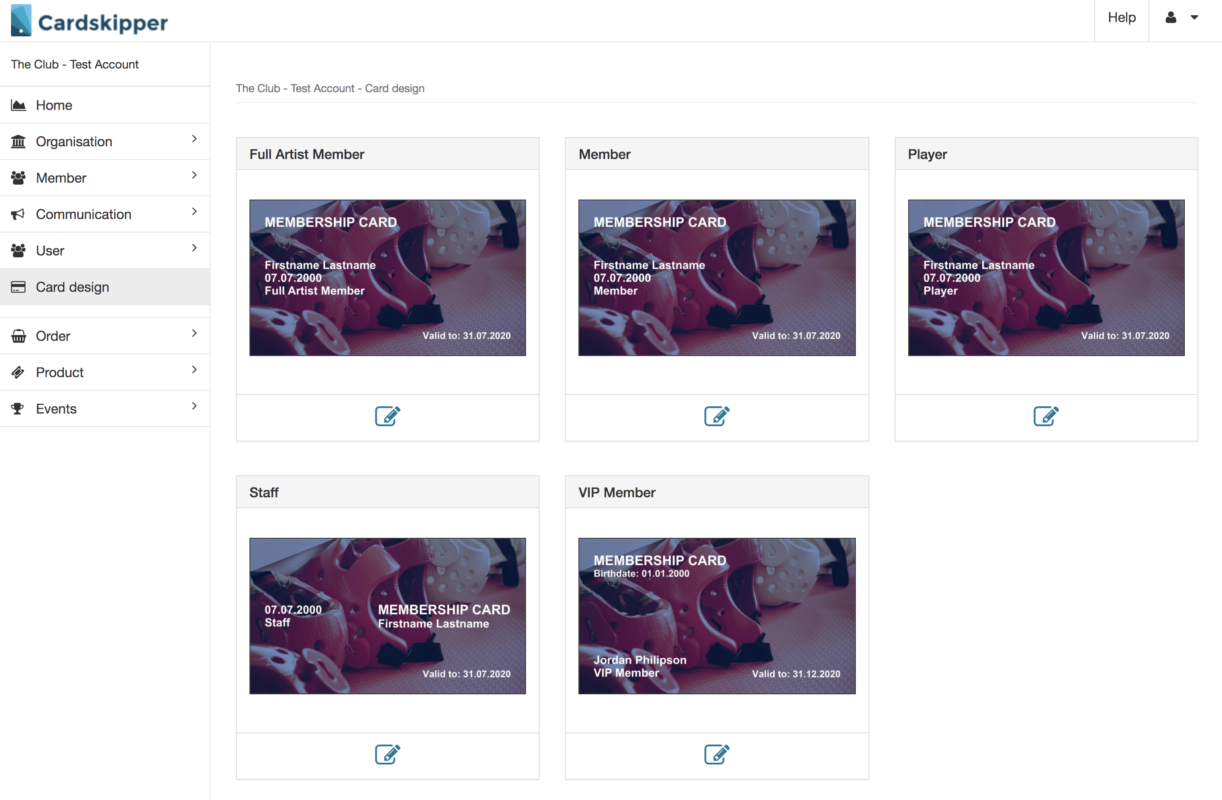
The membership card is based on a background image, images and text.
Click for adding a text and find a keyword by clicking at to make a dynamic text.
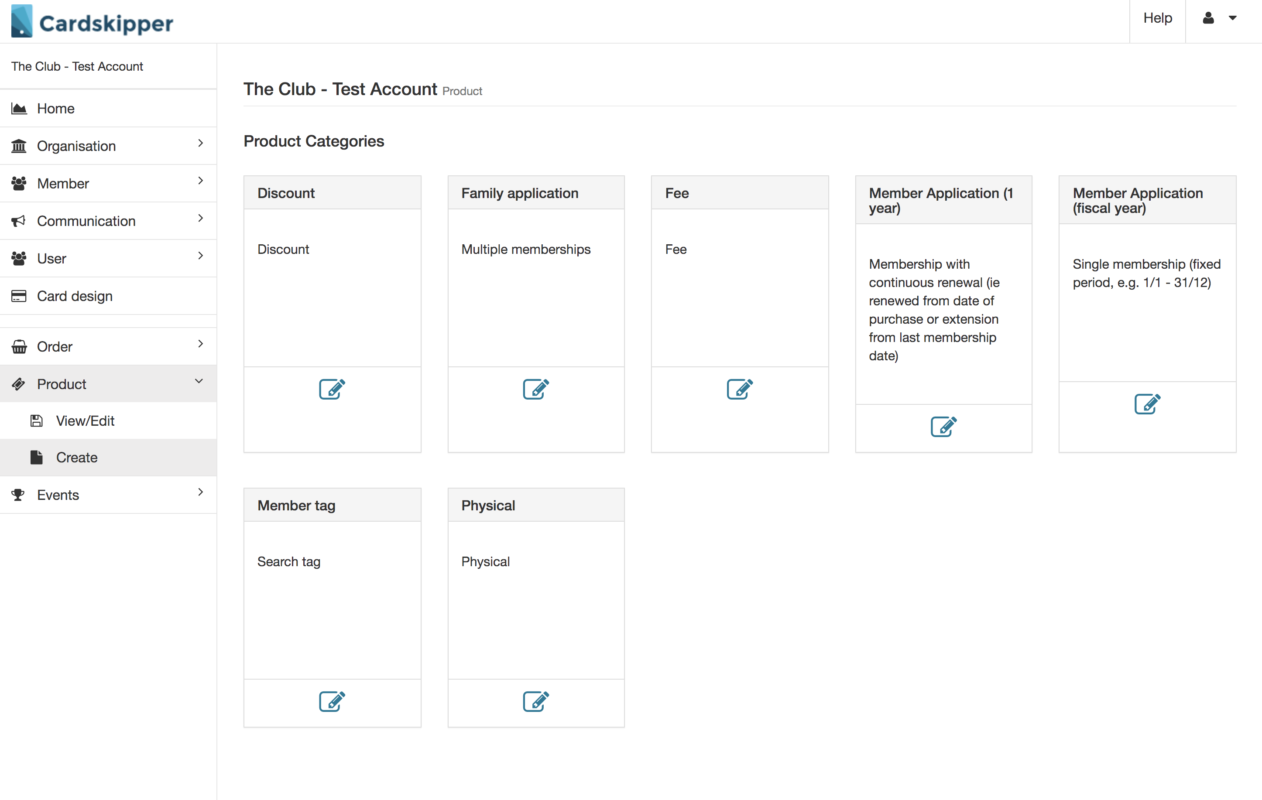
Product
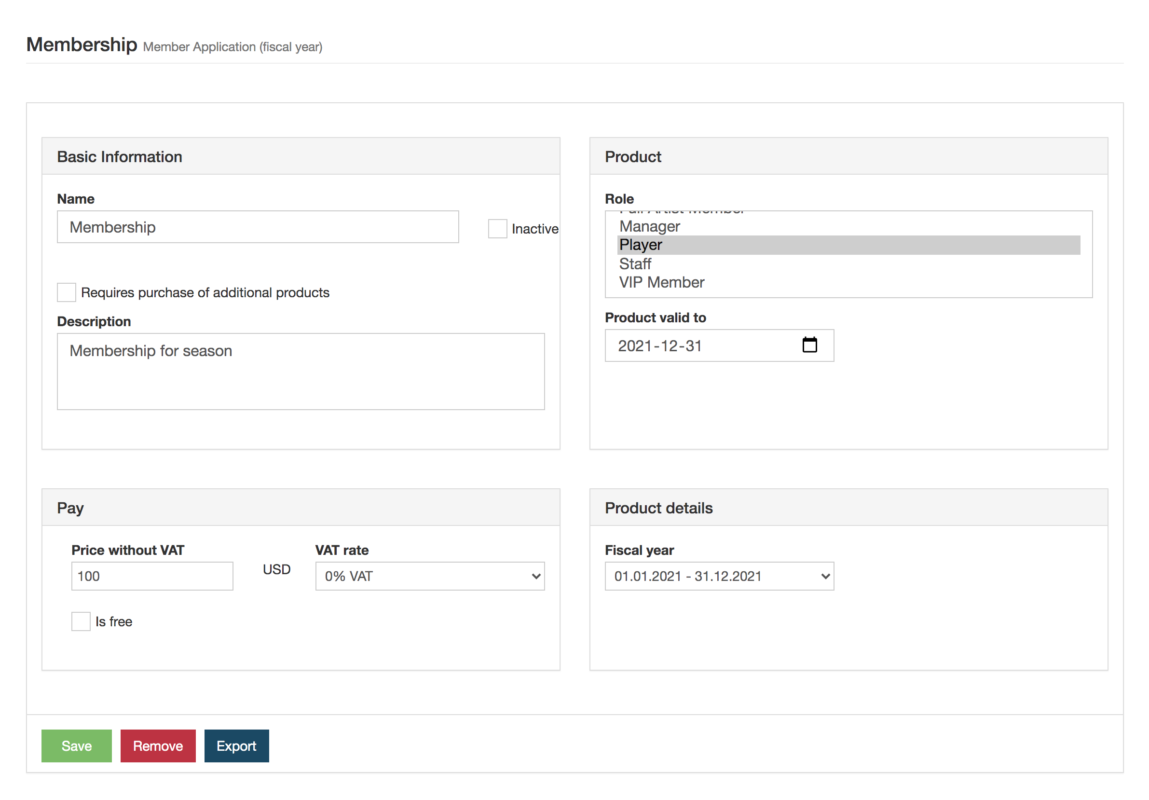
See and edit created products. In this case we have 2 membership fees. Click the to edit the product.
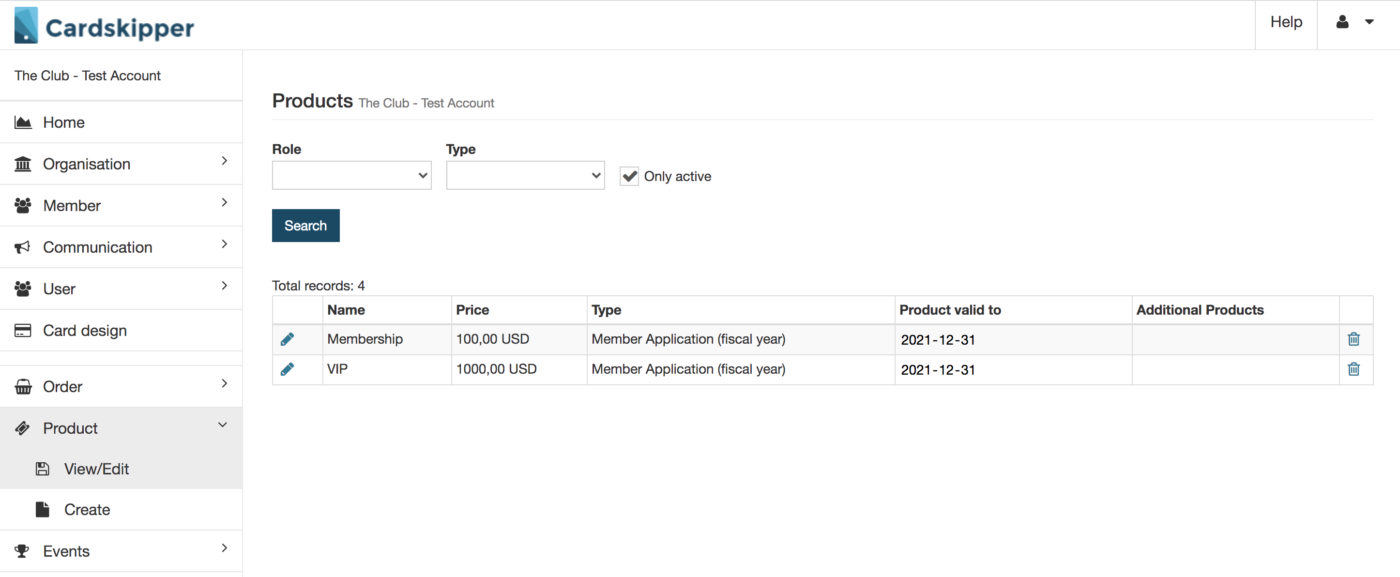
Choose what category the product should have. The most common category is the application types.
Family application is adapted for membership for families.
Member Application is adapted for single members. The type with fiscal year is based on the fiscal year period.
—
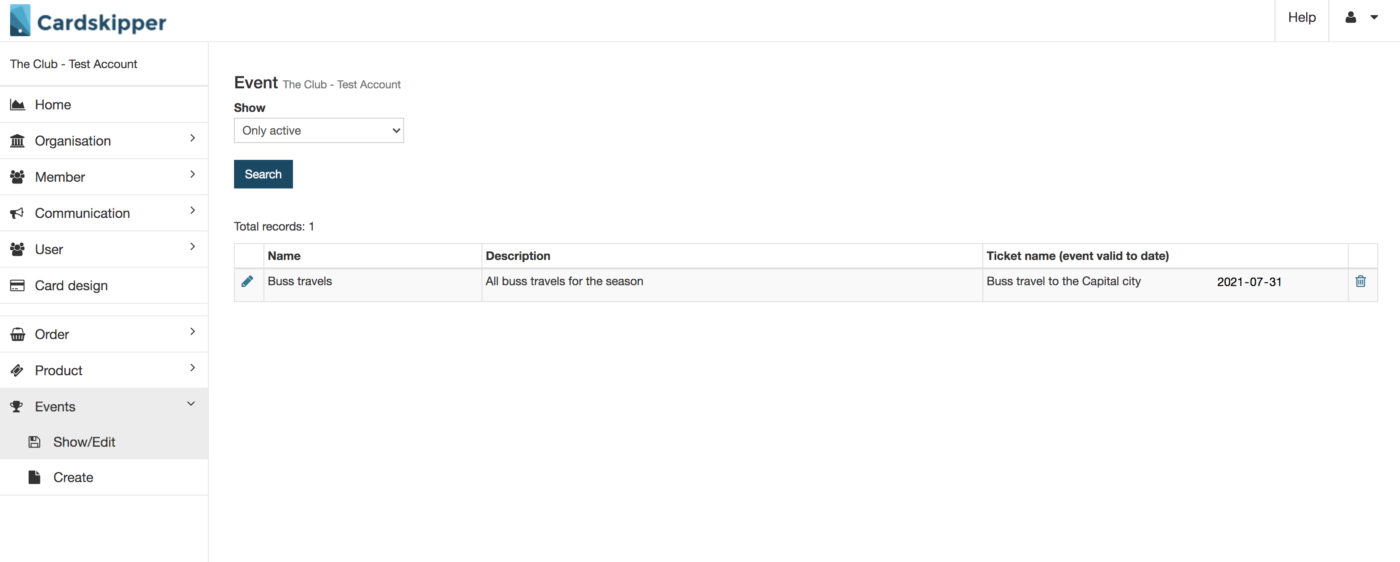
Events
All of your event will be listed here. Click the to edit the event.
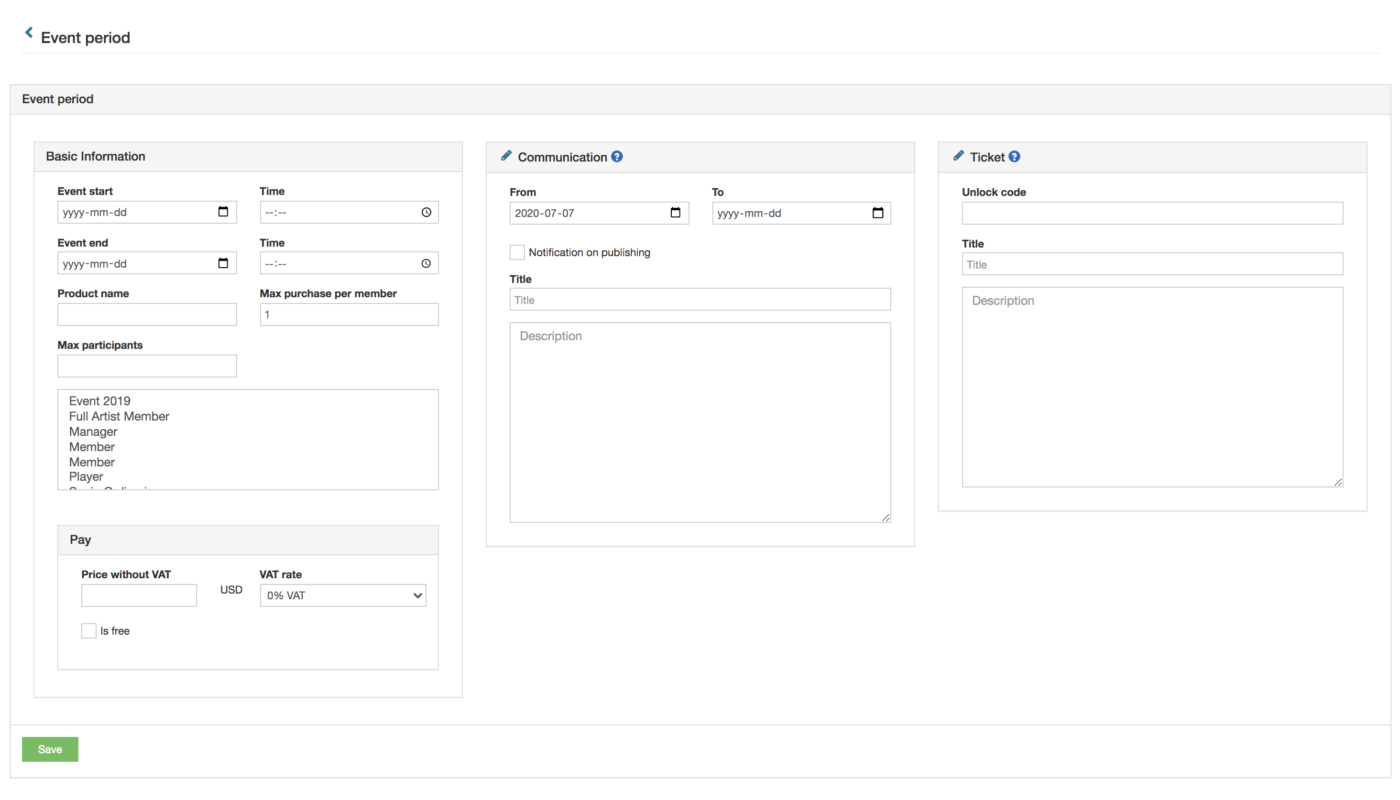
Create a new event period by clicking Create new.
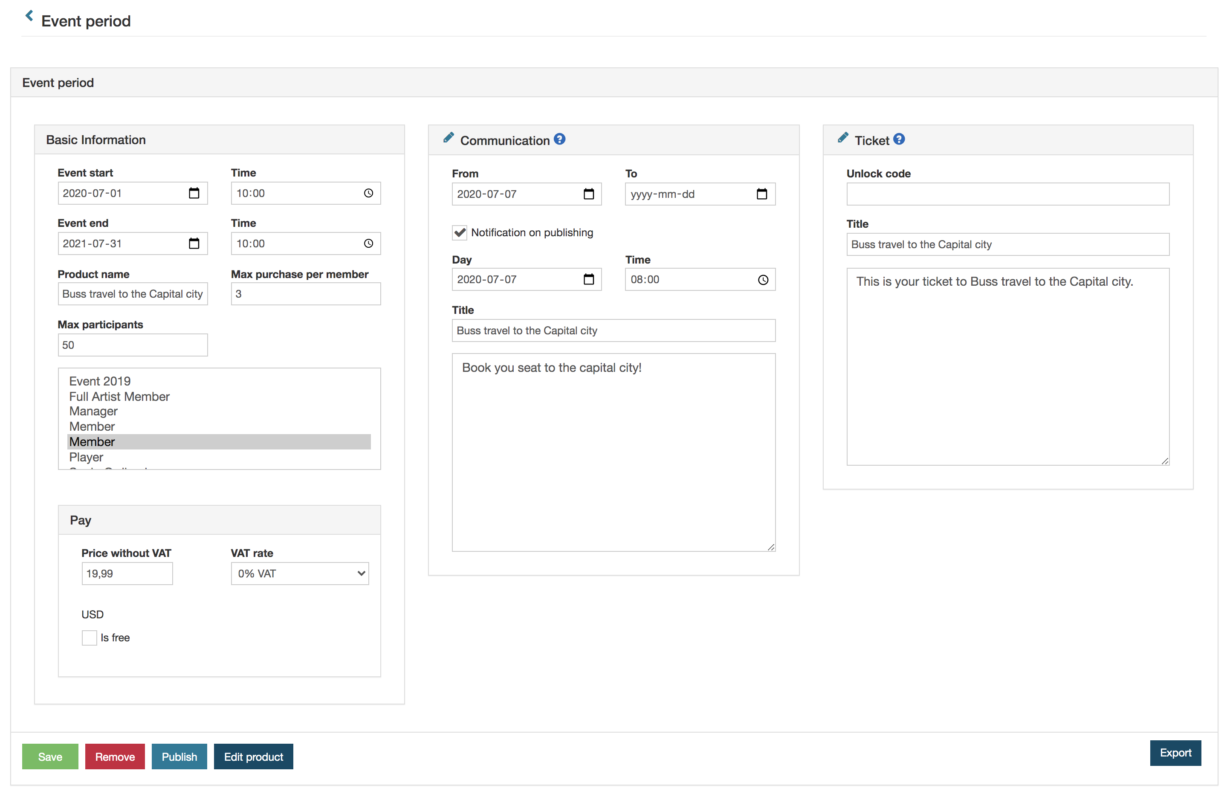
Click to edit the already existing event periods.
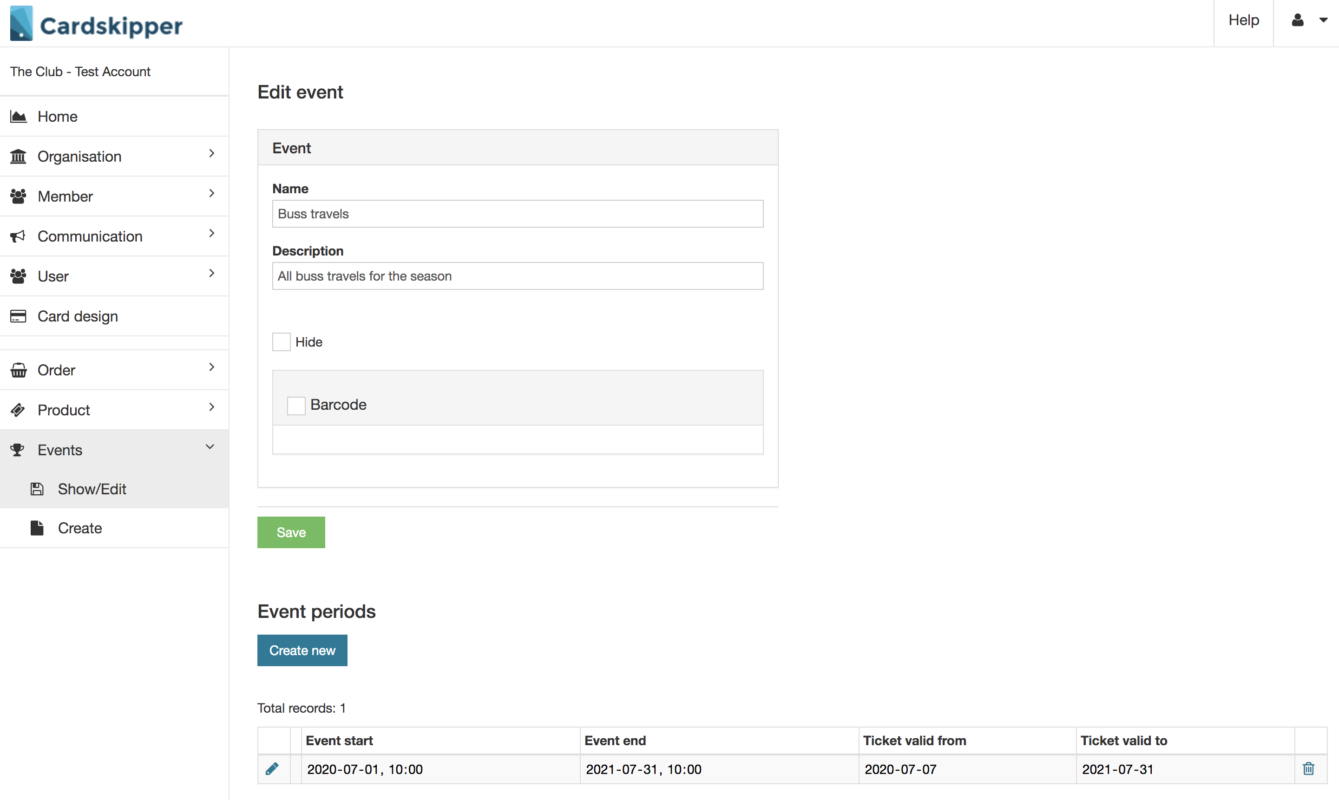
Enter the event period details and make sure you enter the correct information before you click Publish.
Select max purchases per member and max participants for the event. The system will not allow more bookings than the number you enter.
What roles should see the event?
Choose a price, or maybe the event period should be for free?
Fill in when and if the member should receive the communication. Make sure you check the Notification on publishing if you want the members to receive a push notification on their phone.
Add a title and description that fits the event period.
The ticket information will appear in the app for the members when they have made a booking at the event.
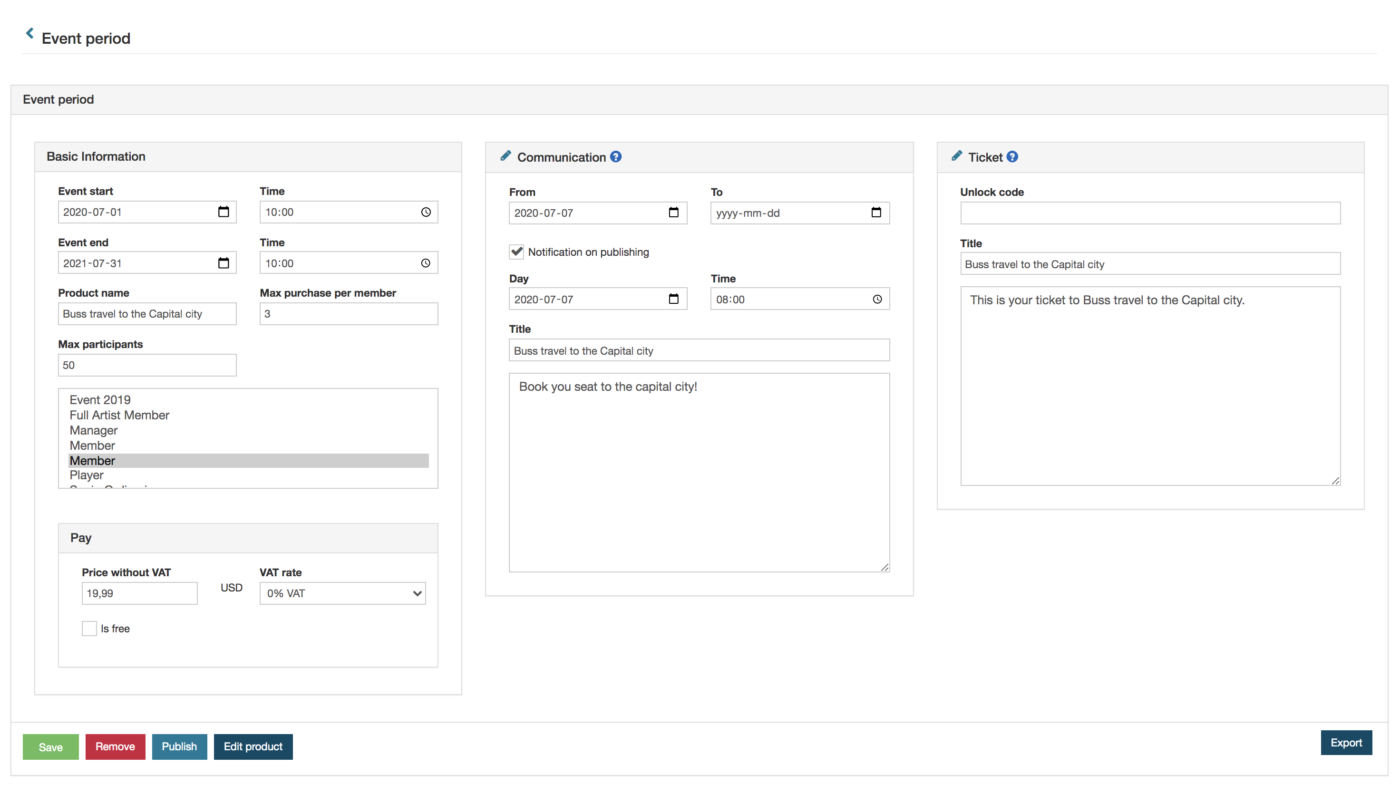
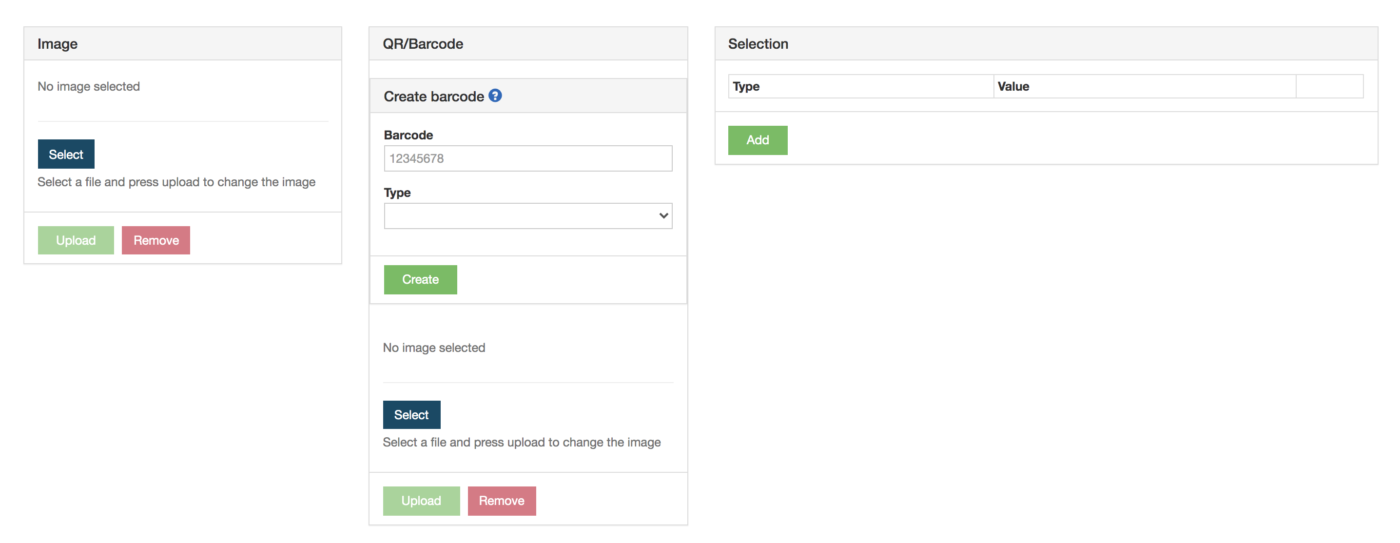
Add an image (optimal ratio is 16:9).
If you want to have a QR/Barcode it’s possible to generate an unique code for every member. Click the and select which data it should be generate by.
Be more specific and change the target group by clicking on Selection Add and then choose what information the target group should be filter of.
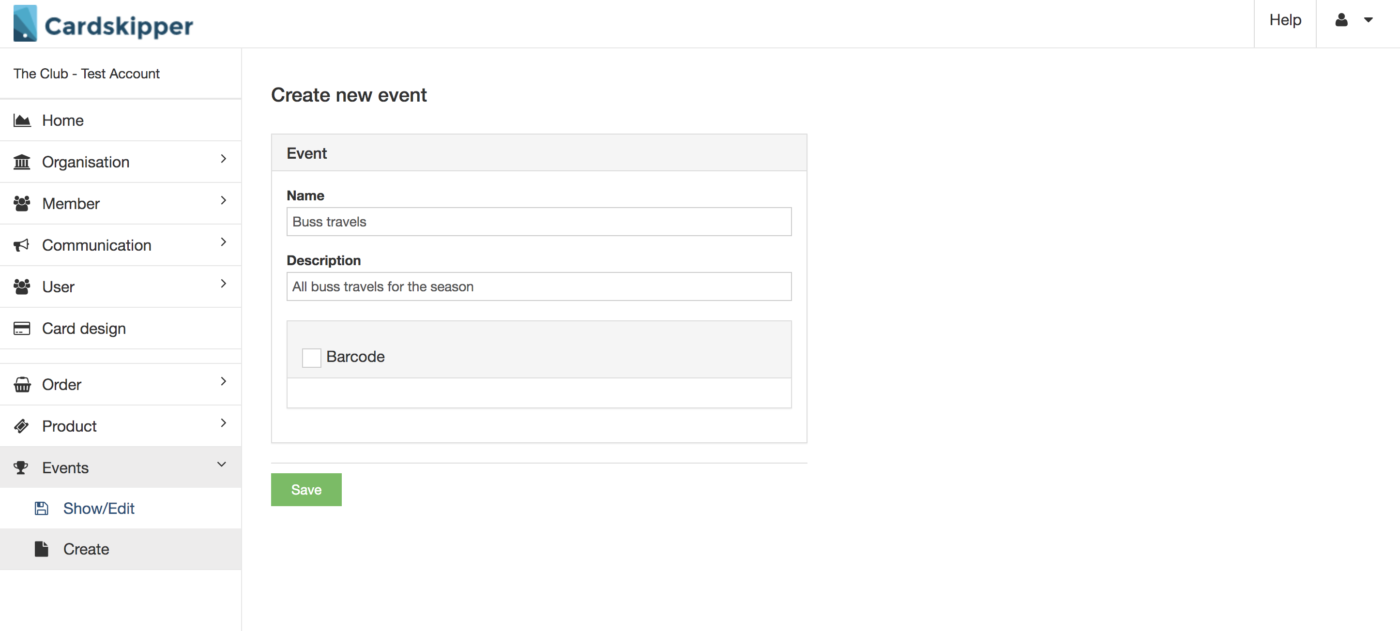
Create a new event by adding a Name and Description and click Save.
Create a new event period by clicking Create new.
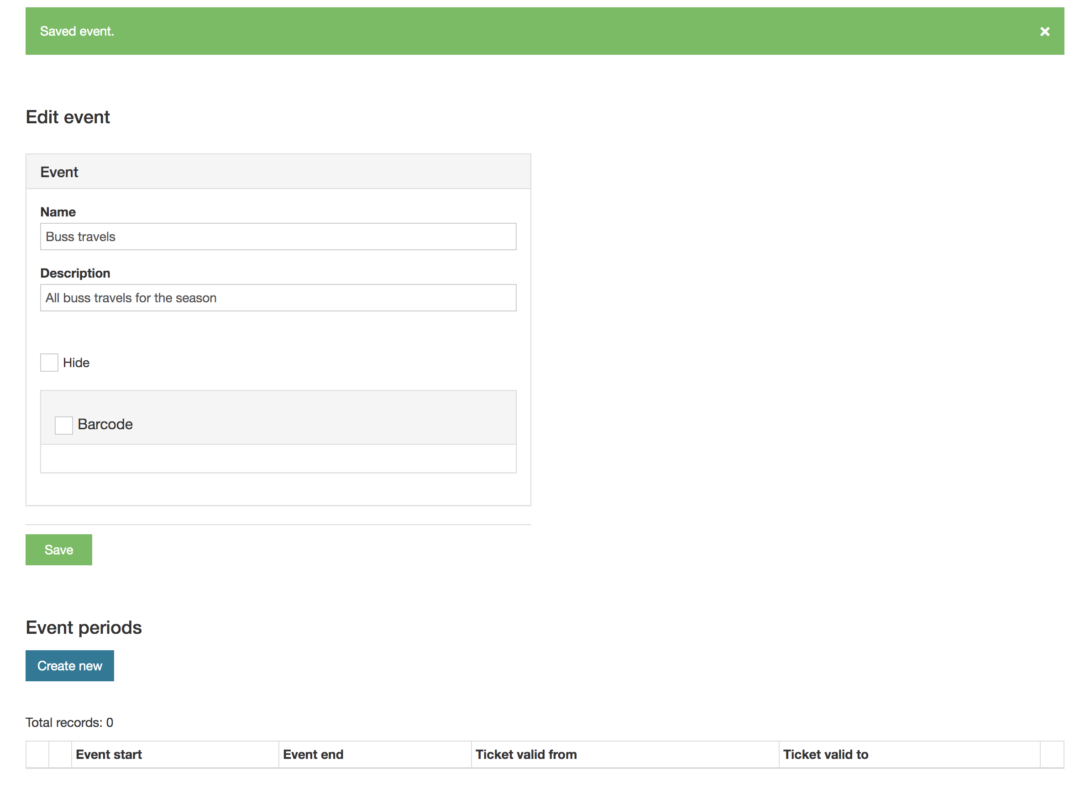
Enter the details for the event period.
Select max purchases per member and max participants for the event. The system will not allow more bookings than the number you enter.
What roles should see the event?
Choose a price, or maybe the event period should be for free?
Fill in when and if the member should receive the communication. Make sure you check the Notification on publishing if you want the members to receive a push notification on their phone.
Add a title and description that fits the event period.
The ticket information will appear in the app for the members when they have made a booking at the event.
Make sure you enter the correct information before you click Publish.
Add an image (optimal ratio is 16:9).
If you want to have a QR/Barcode it’s possible to generate an unique code for every member. Click the and select which data it should be generate by.
Be more specific and change the target group by clicking on Selection Add and then choose what information the target group should be filter of.